This post will explain 2 different ways you can join a C2C or corner to corner blanket together.
There are a lot of blanket patterns out there, that you make a lot of different squares, but then come the point you have to join them, and if they are different colour squares – it all comes down to what kind of effect you want (and if you can see the back!).
These techniques can also be used for tapestry crochet, or joining any squares together.
What is C2C?
C2C is also known as corner to corner crochet. You don’t make the squares in traditional rows, but in diagonals.
I adore C2C, so have a lot of other posts on how to do C2C here:
>>>How to do C2C for absolute beginners
>>>How to change colour in C2C
And some great C2C patterns here
Do you have a right and wrong side for your C2C?
Depending on how you carry the yarn for your squares, you may end up with a right or wrong side.
It’s important you know what the right and wrong side of the squares are.
If you’ve carried the yarn over the back of the square, so you’ve got excess yarn showing, you need to make sure you are lining up the squares correctly.
This is fine if you’ve made this this way, a lot of crocheters do, then line the back with a fleece (so you can’t see it).
I personally prefer to have it so the back looks as good as the front (I think this comes from my days of doing cross stitch).
How to Join C2C squares together.
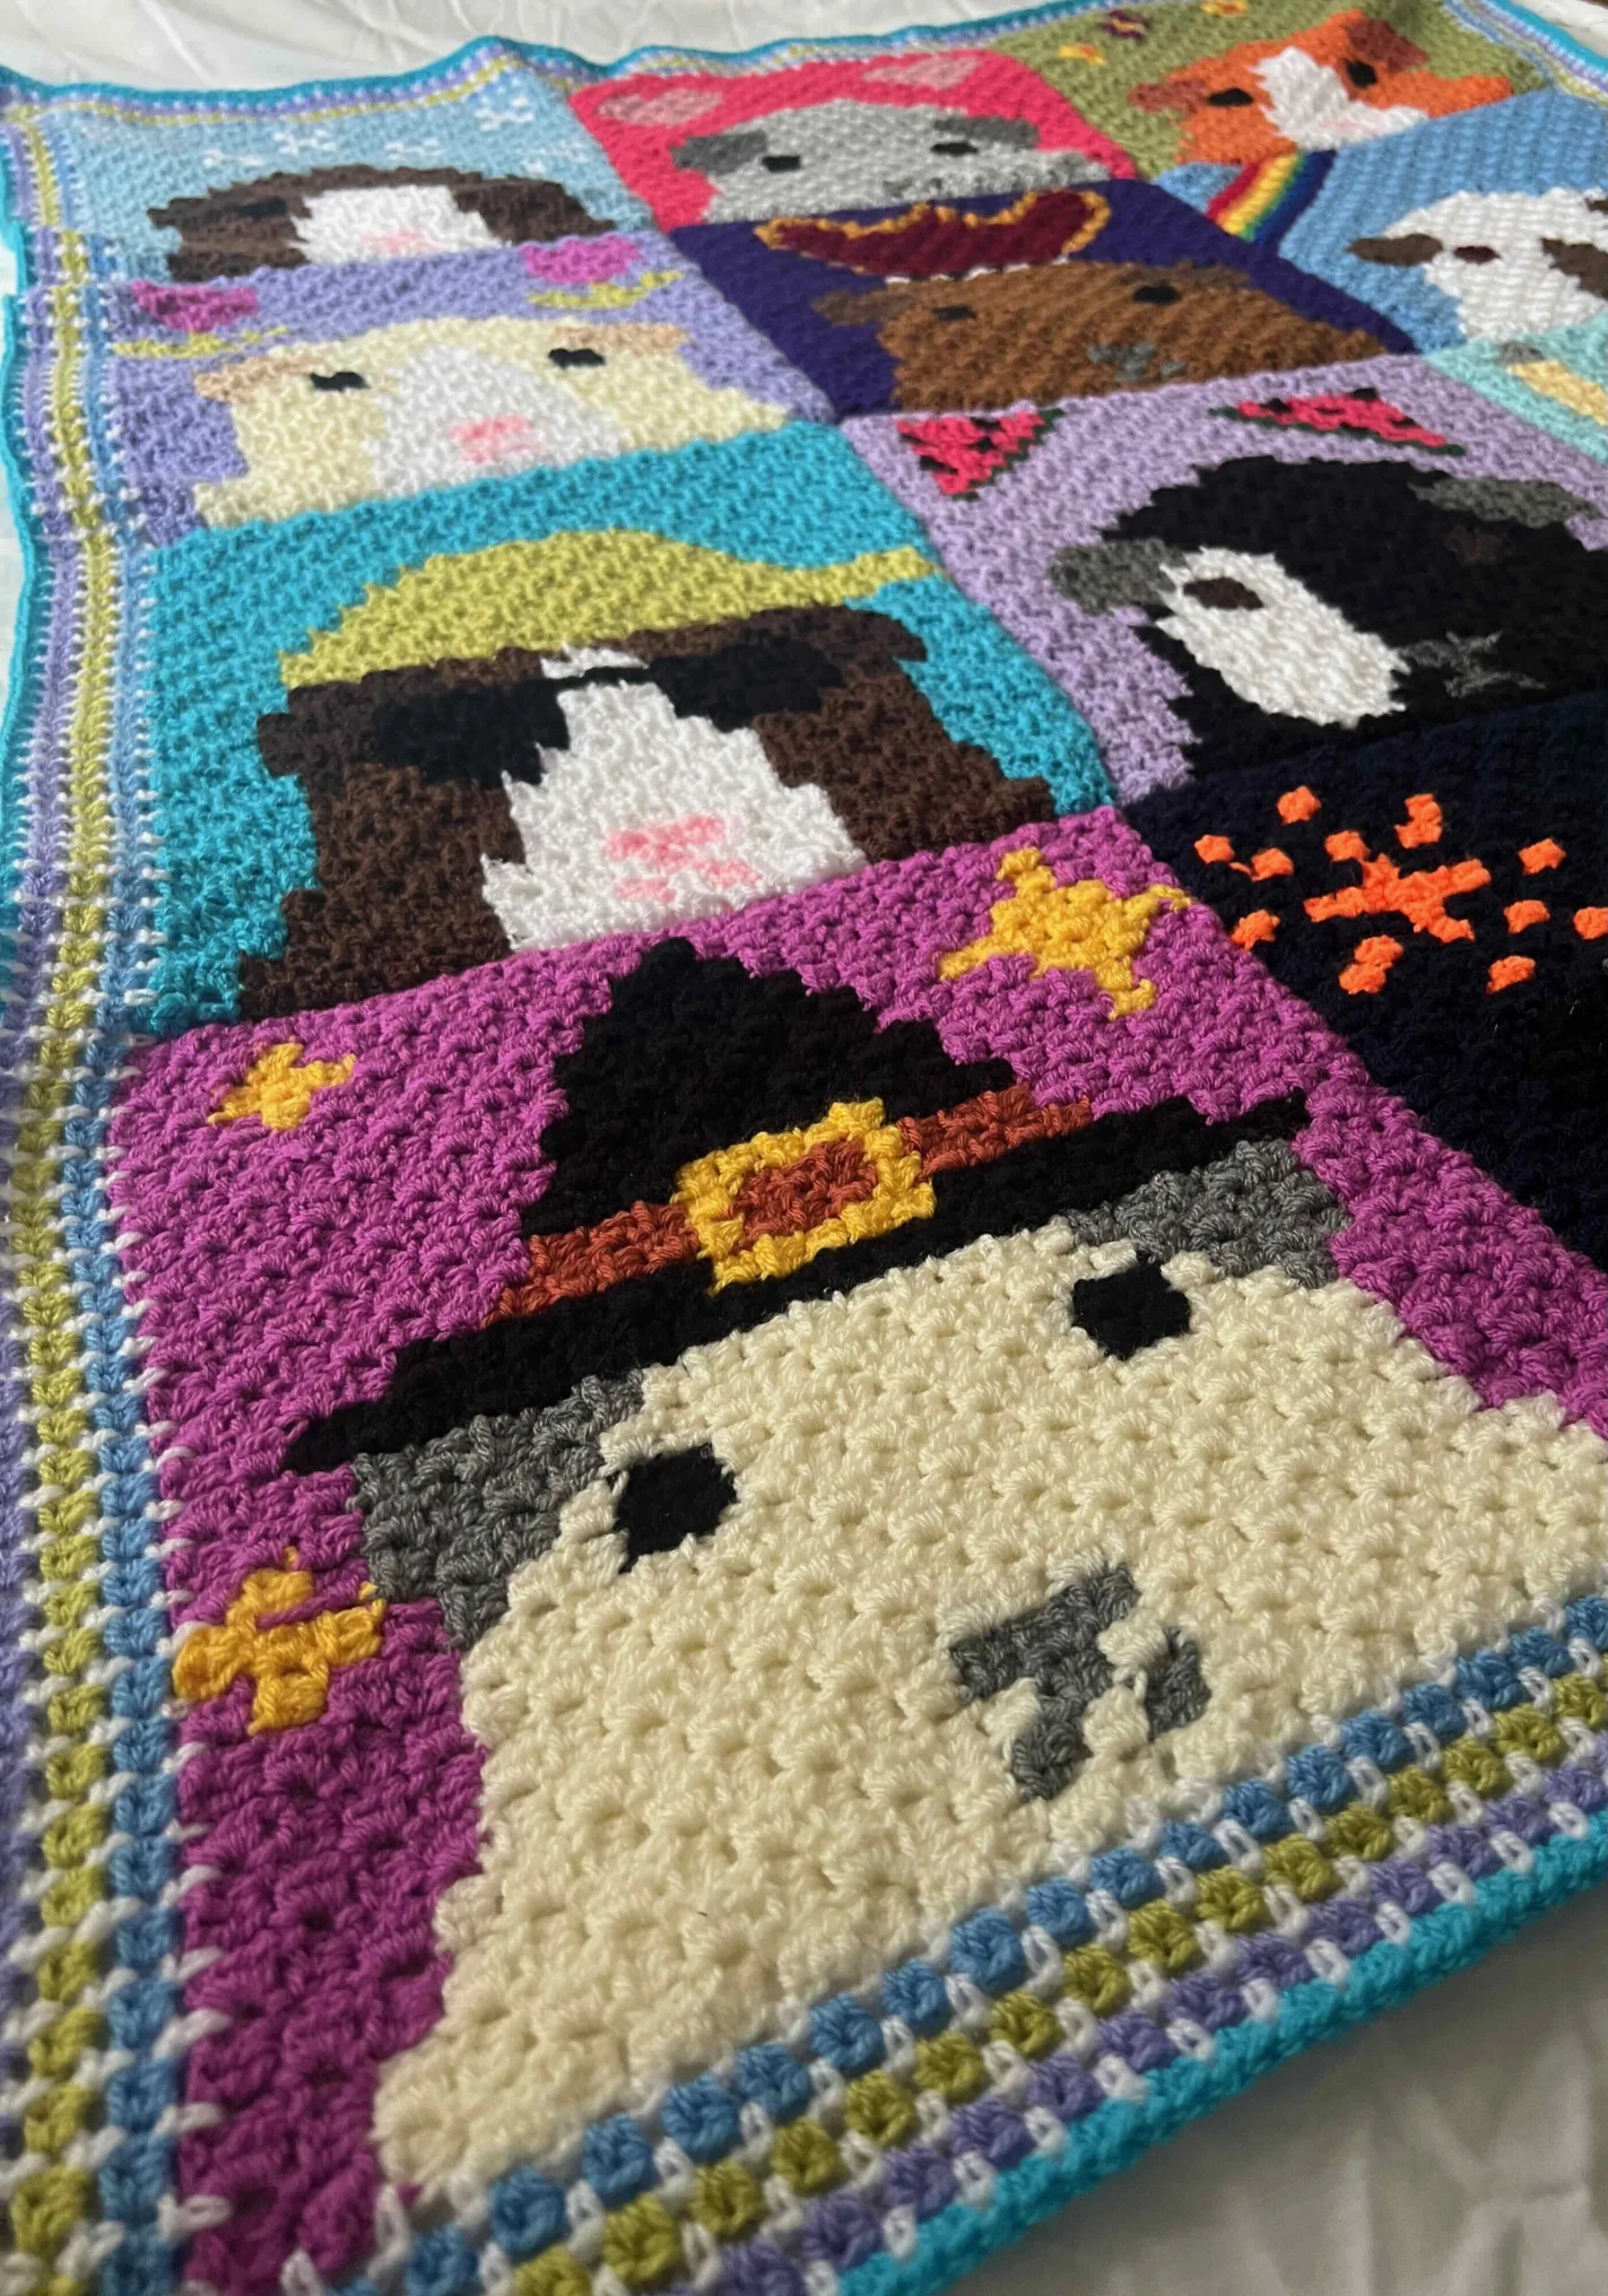
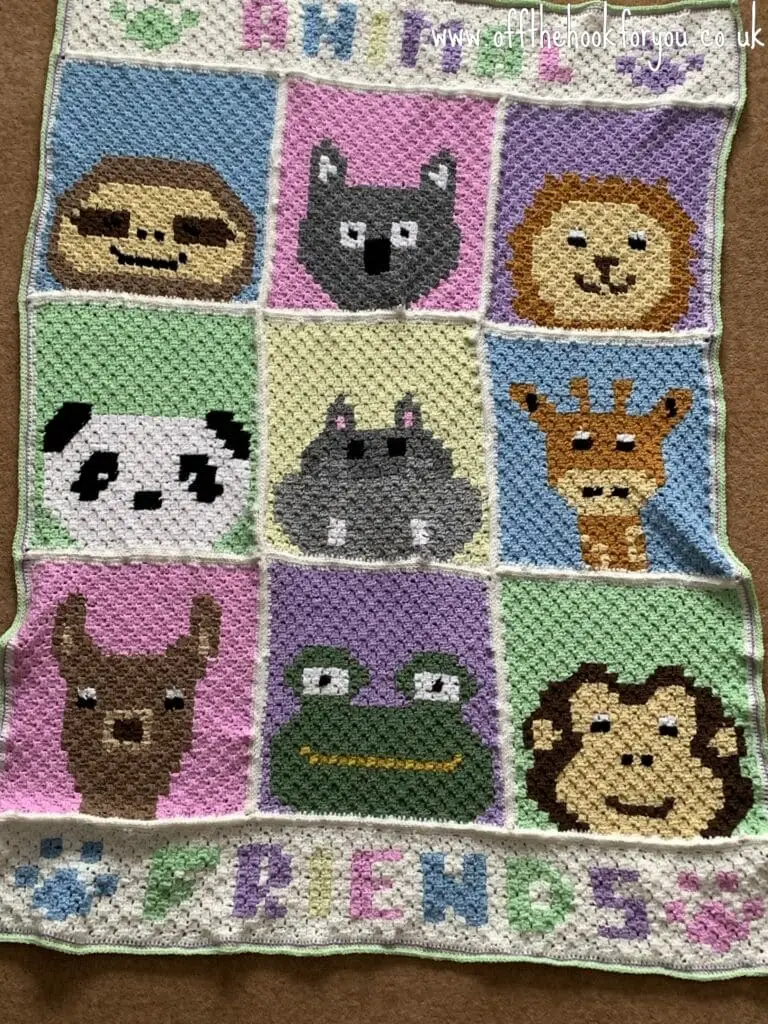
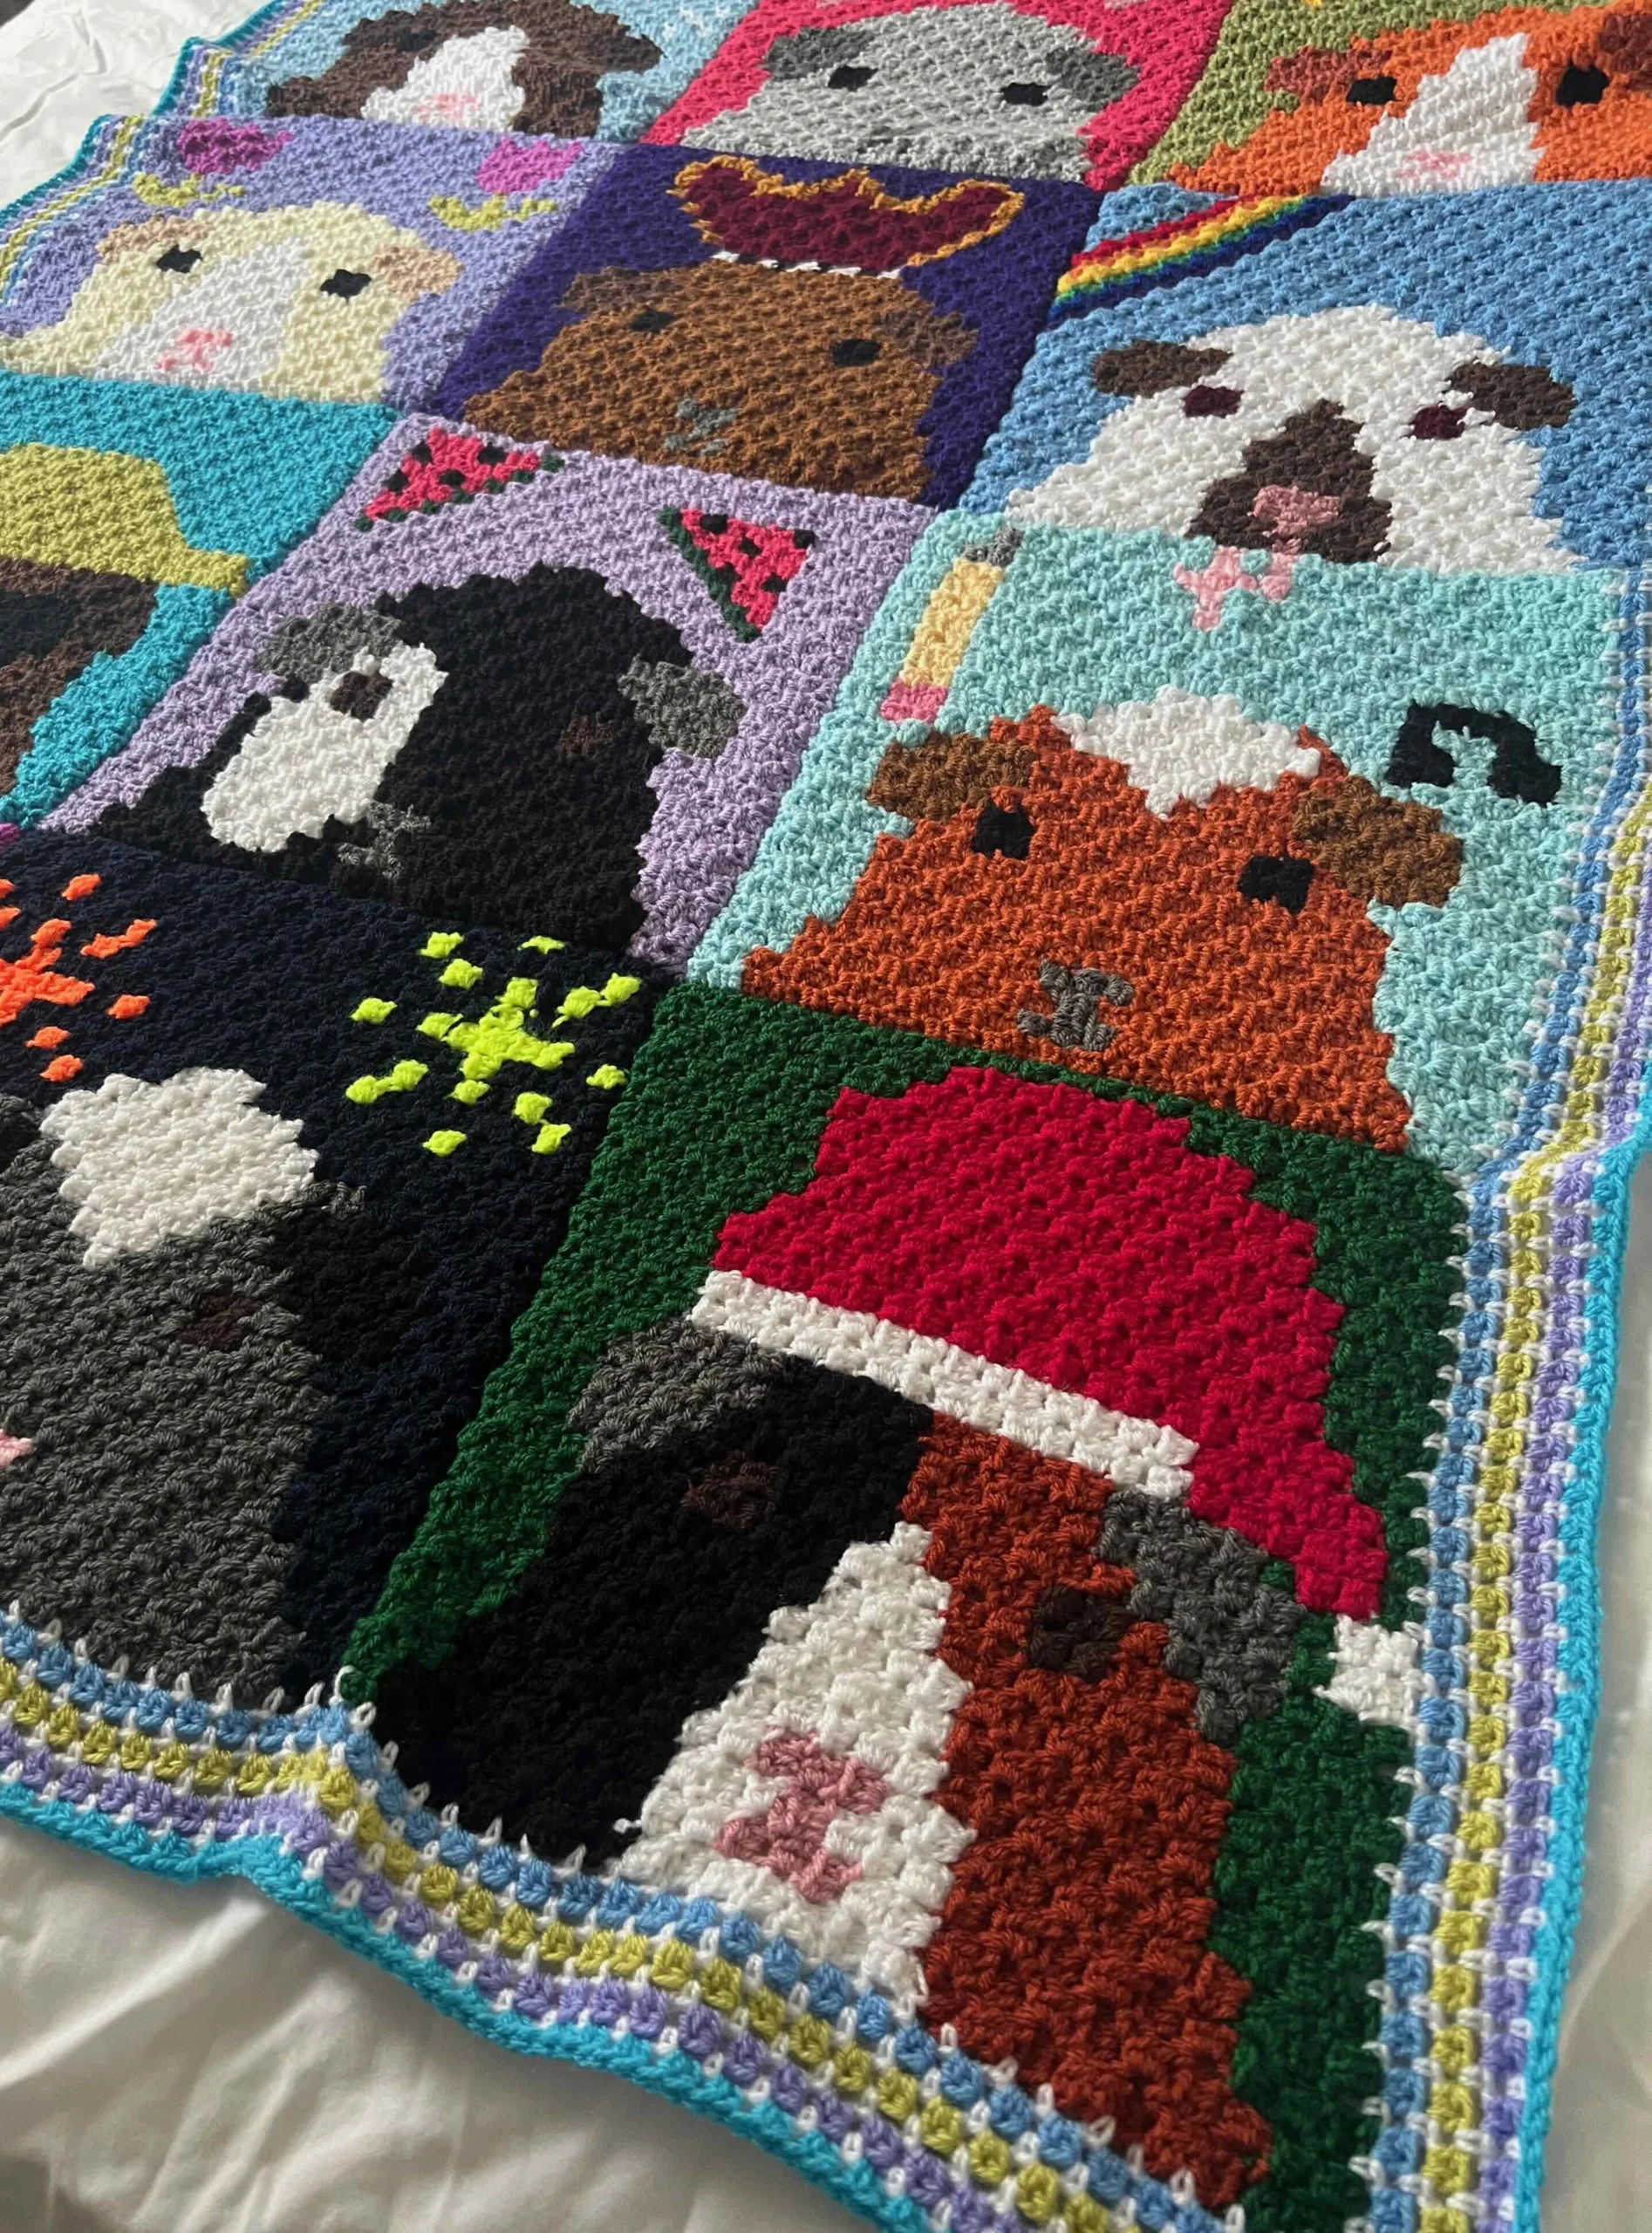
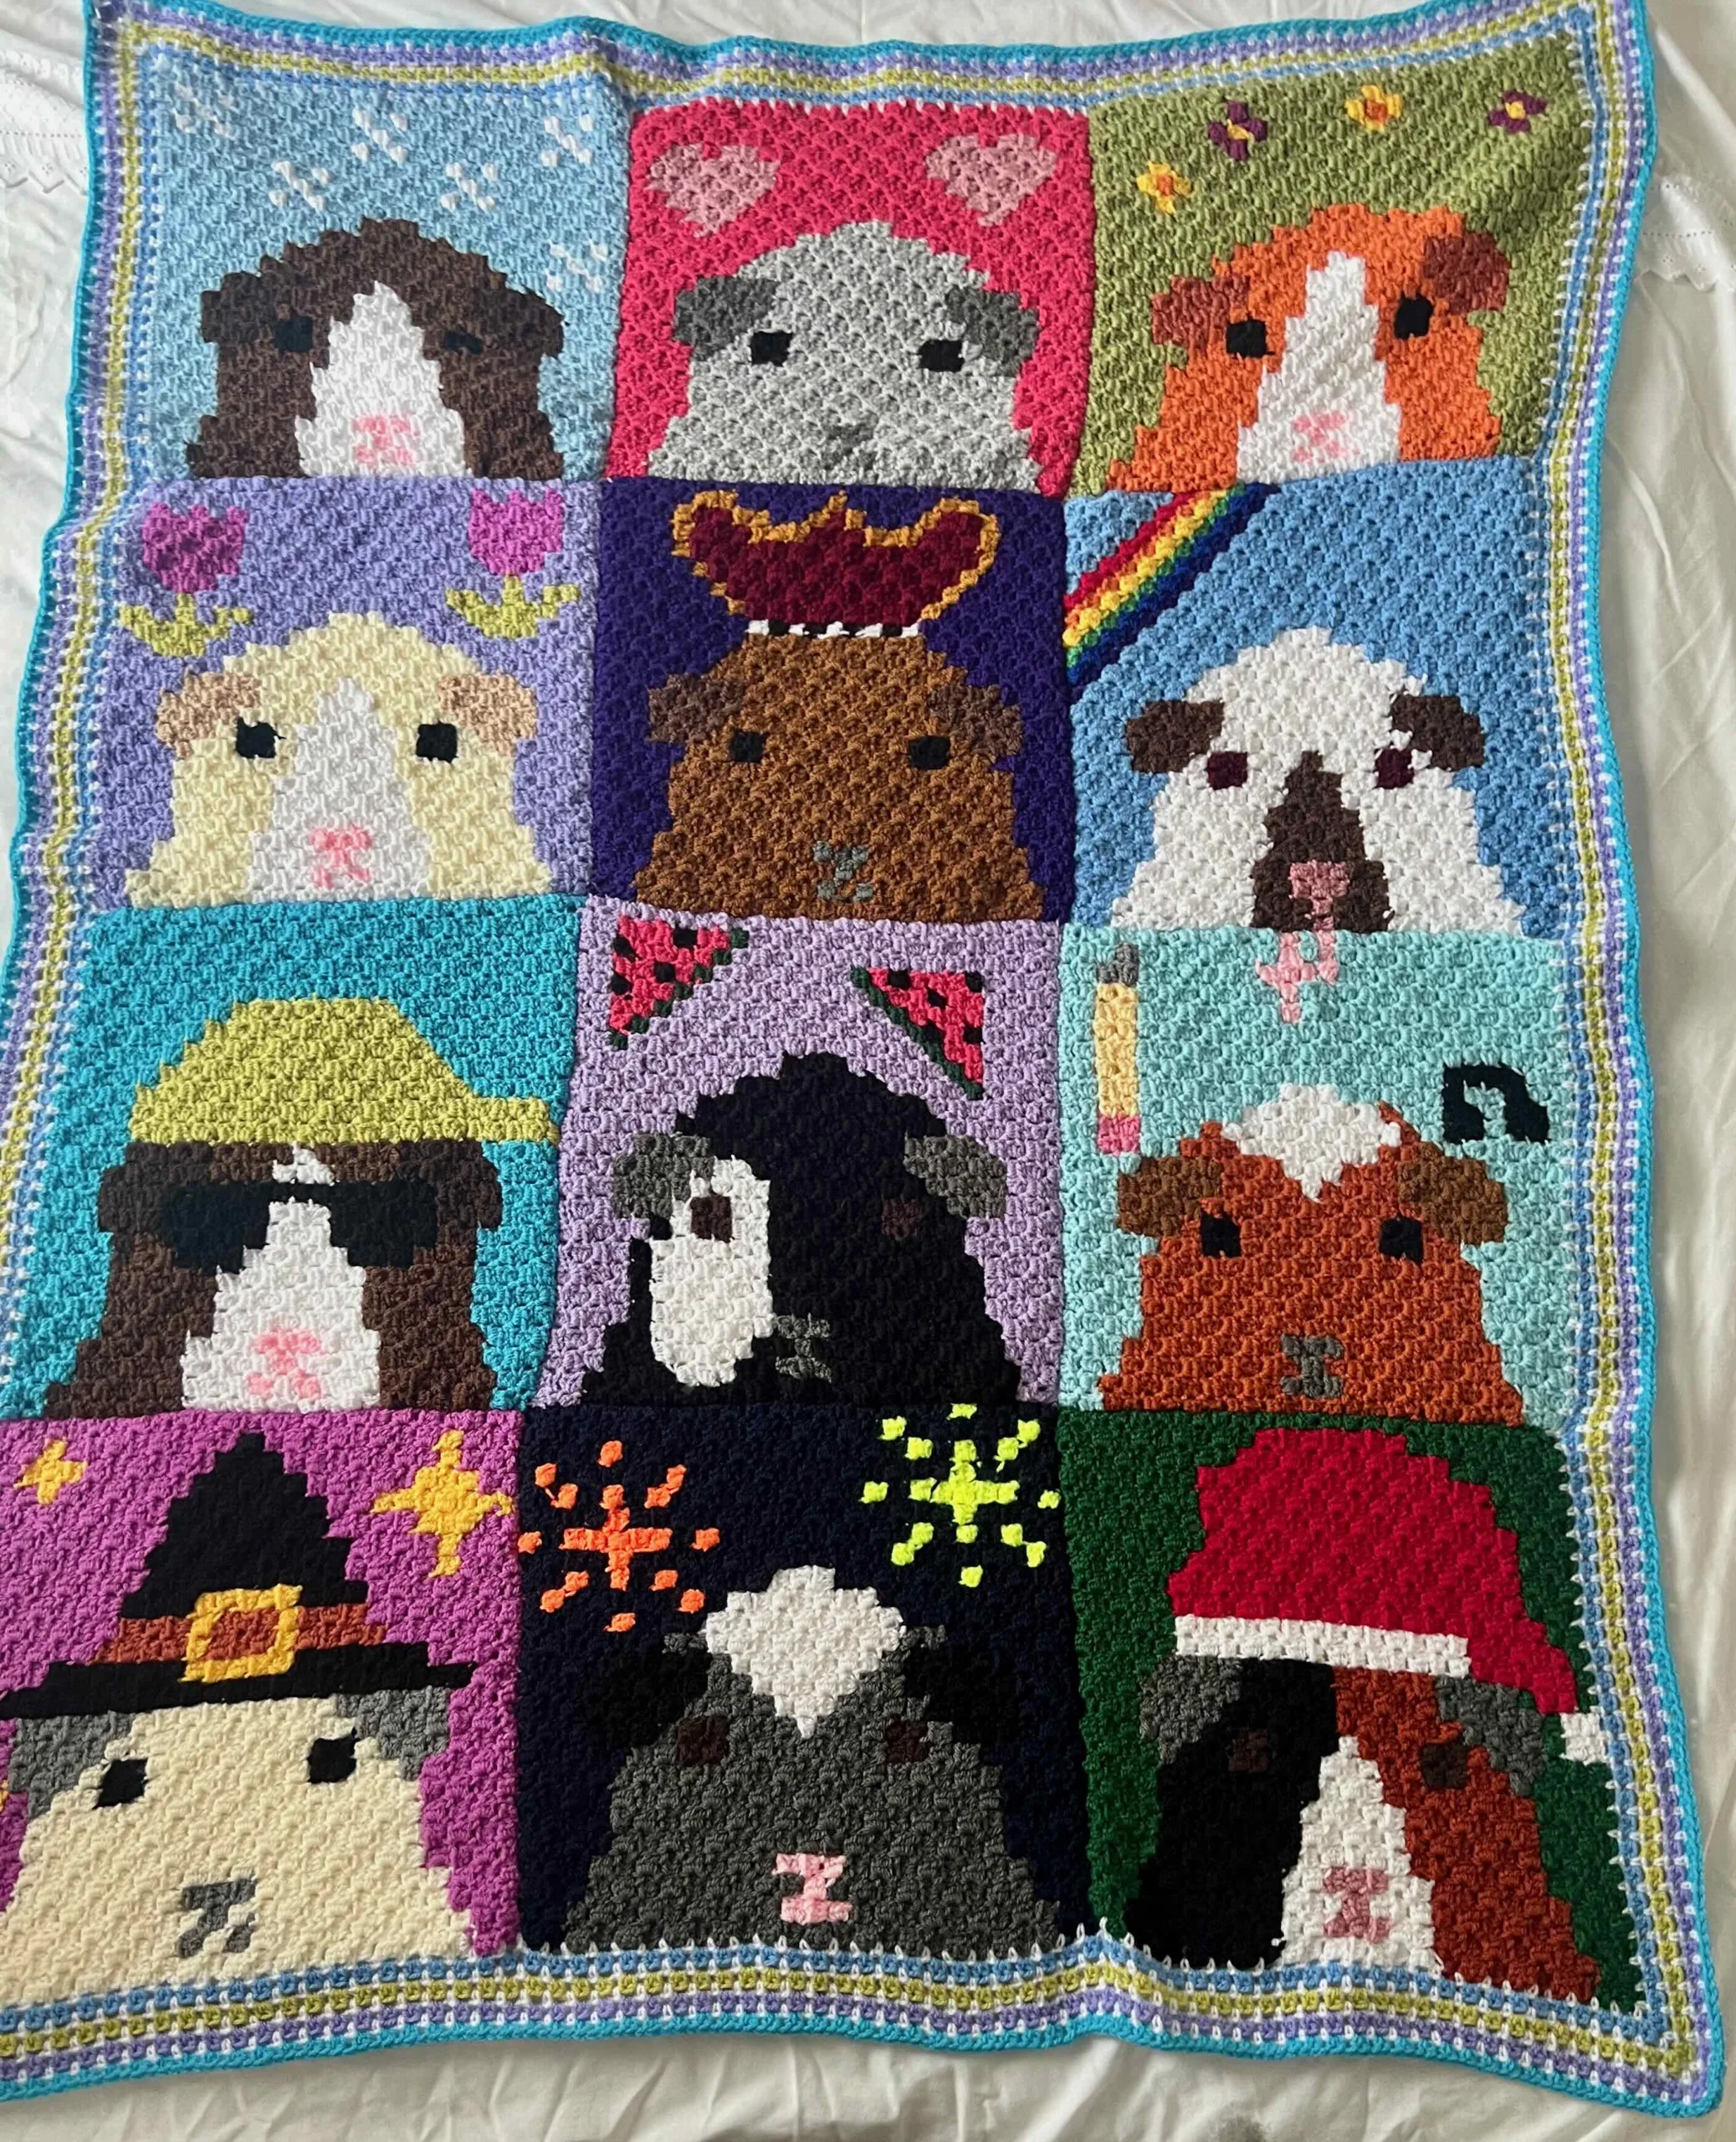
If you have squares of different colours, like in the Guinea Pig Cal, you can add a border to your squares, or join your squares directly.
For the Animal Along, I crocheted around every square, in HDC in cream, but when I started to so this for the Guinea pigs, it looked “wrong”.
Joining C2C squares with a border
You need to pick your joining colour, and crochet around each square, usually with the same stitch the square is made from.
HDC C2C = HDC border.
This option gives you further choices.
Do you want a raised seam like this starburst blanket?
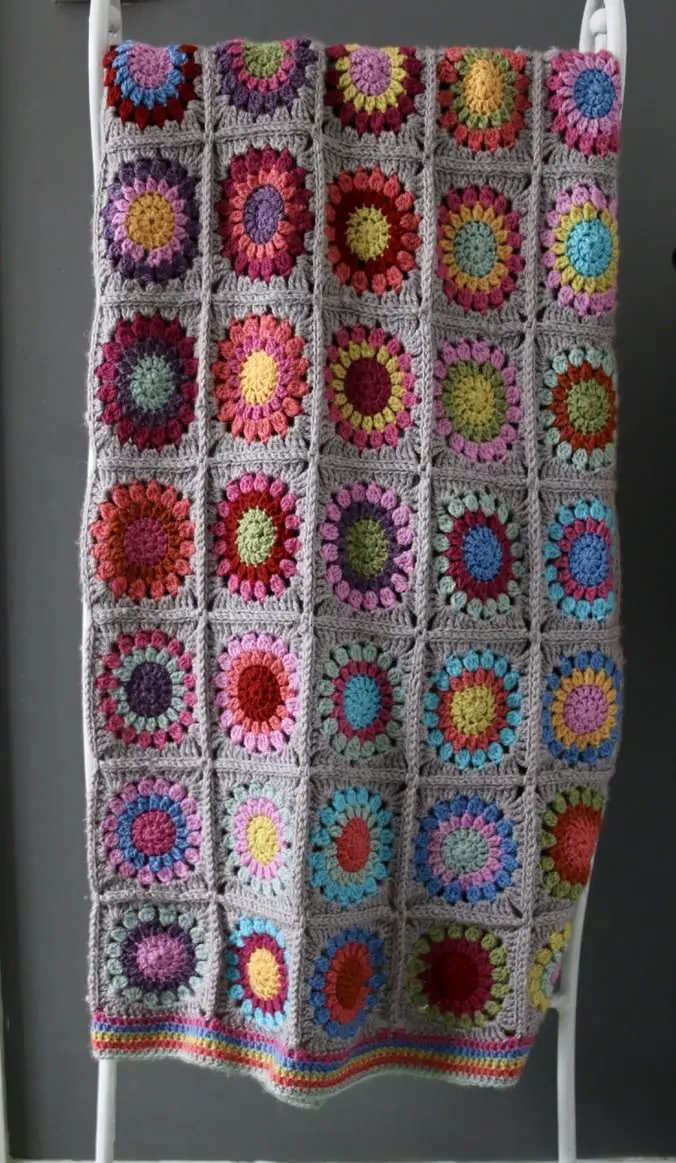
If so, you need to place the back/ wrong sides together, and crochet through the back loops only joining with a single crochet stitch.
For a flat seam, back/ wrong sides together, and slip stitch to join through the back loops only.
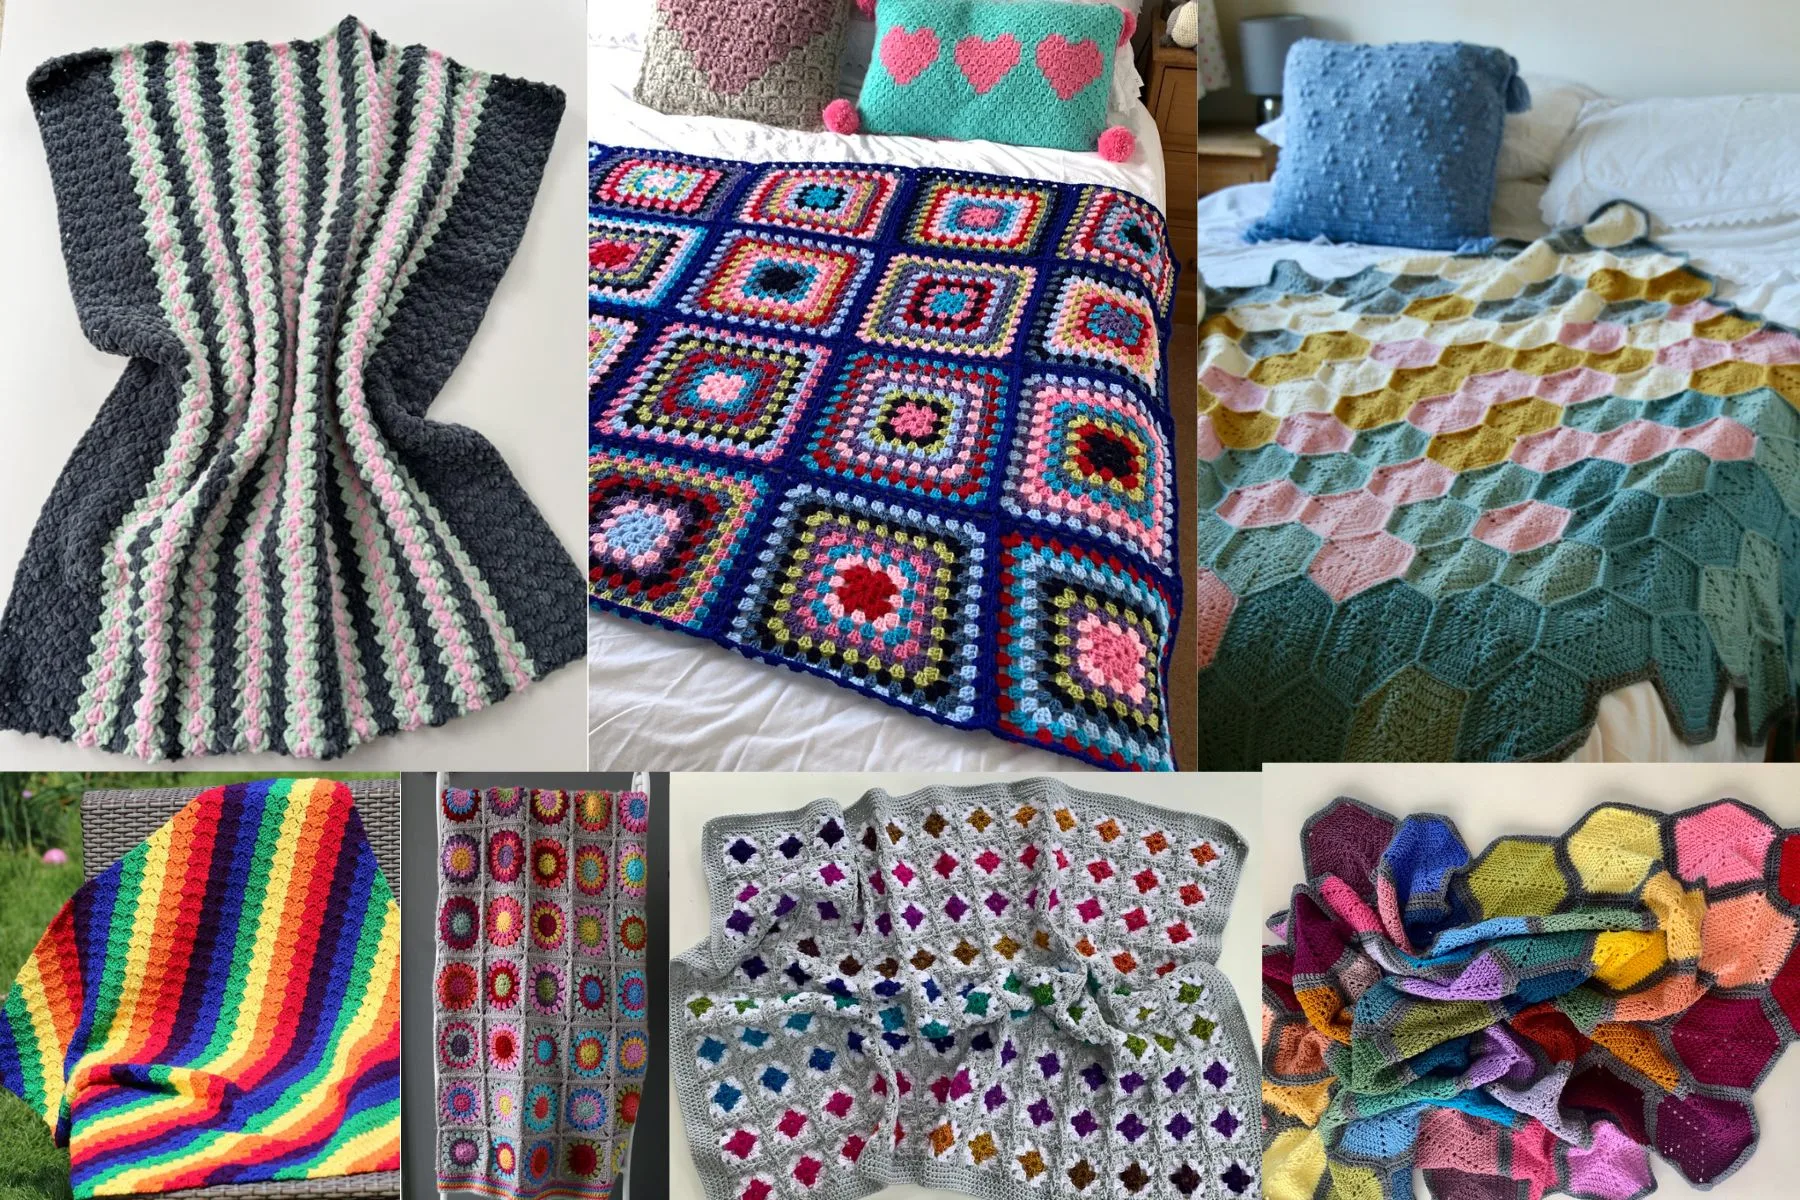
>>> Easy Chenille Baby Blanket >>> Granny Square Blanket >>> Hexilove Blanket
>>> Easy Rainbow Blanket >>> Starburst Granny Blanket >>> Rainbow Granny Blanket >>>Rainbow Hexagon Blanket
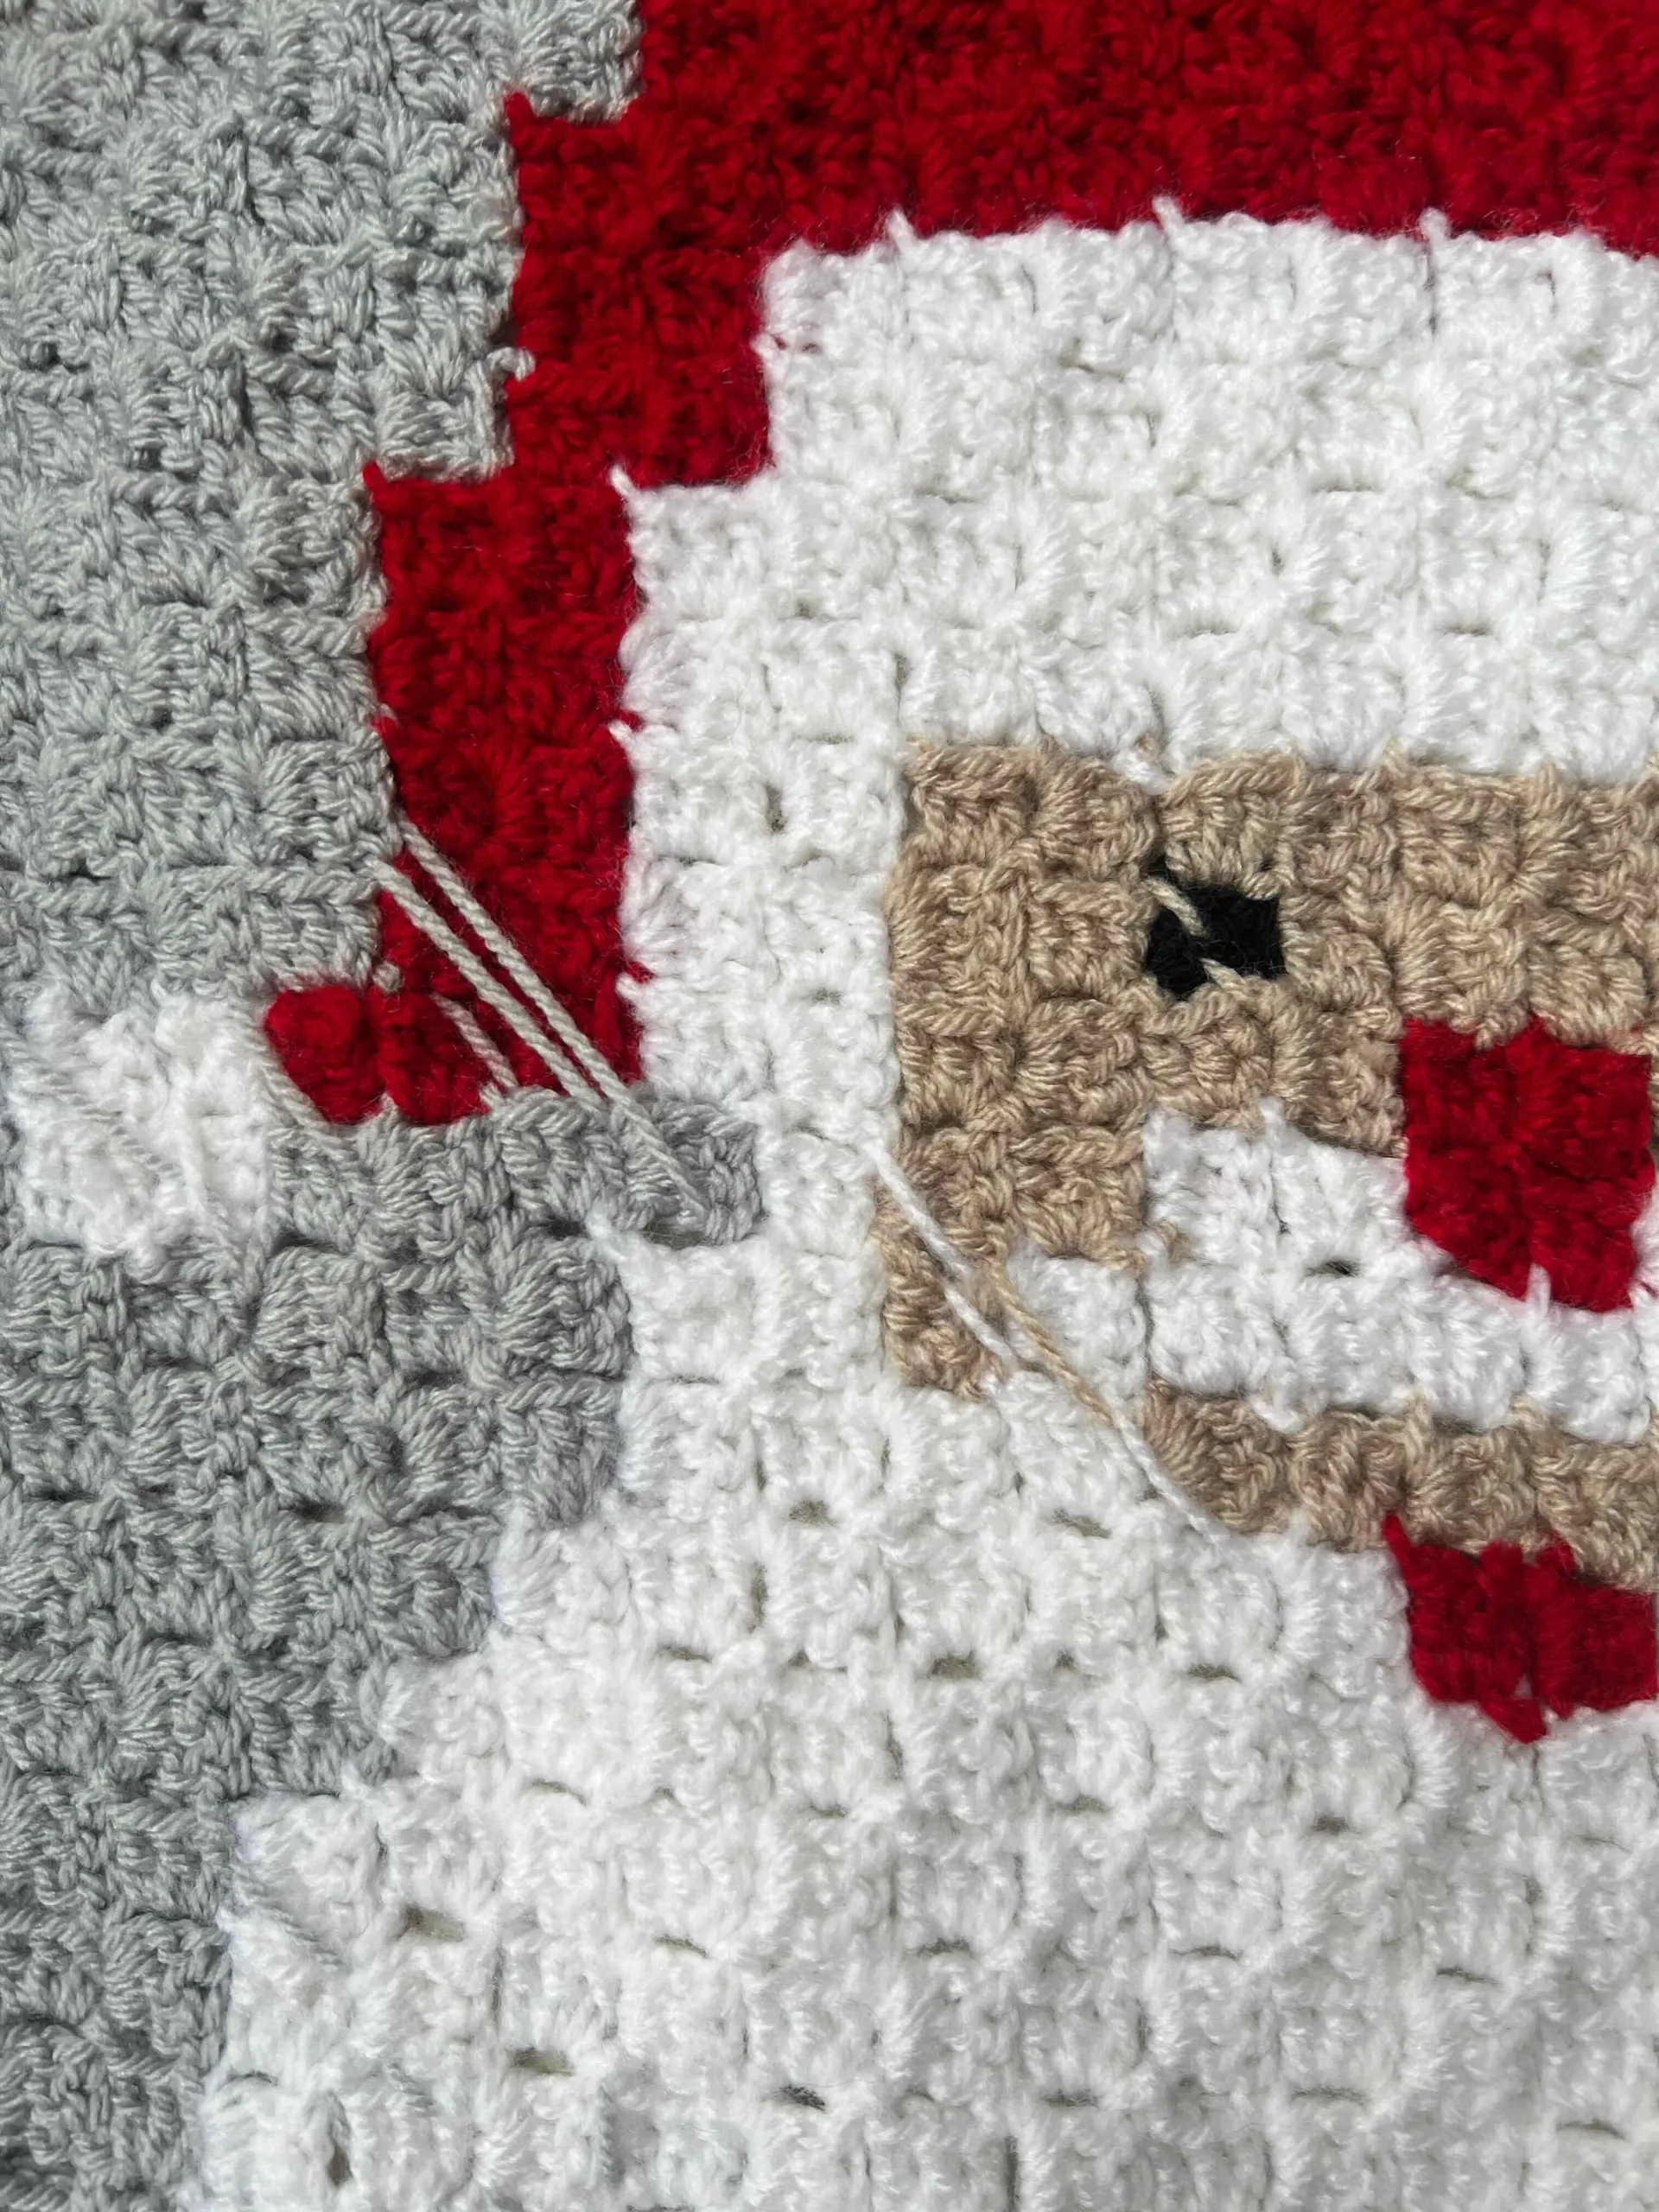
For a seamless join
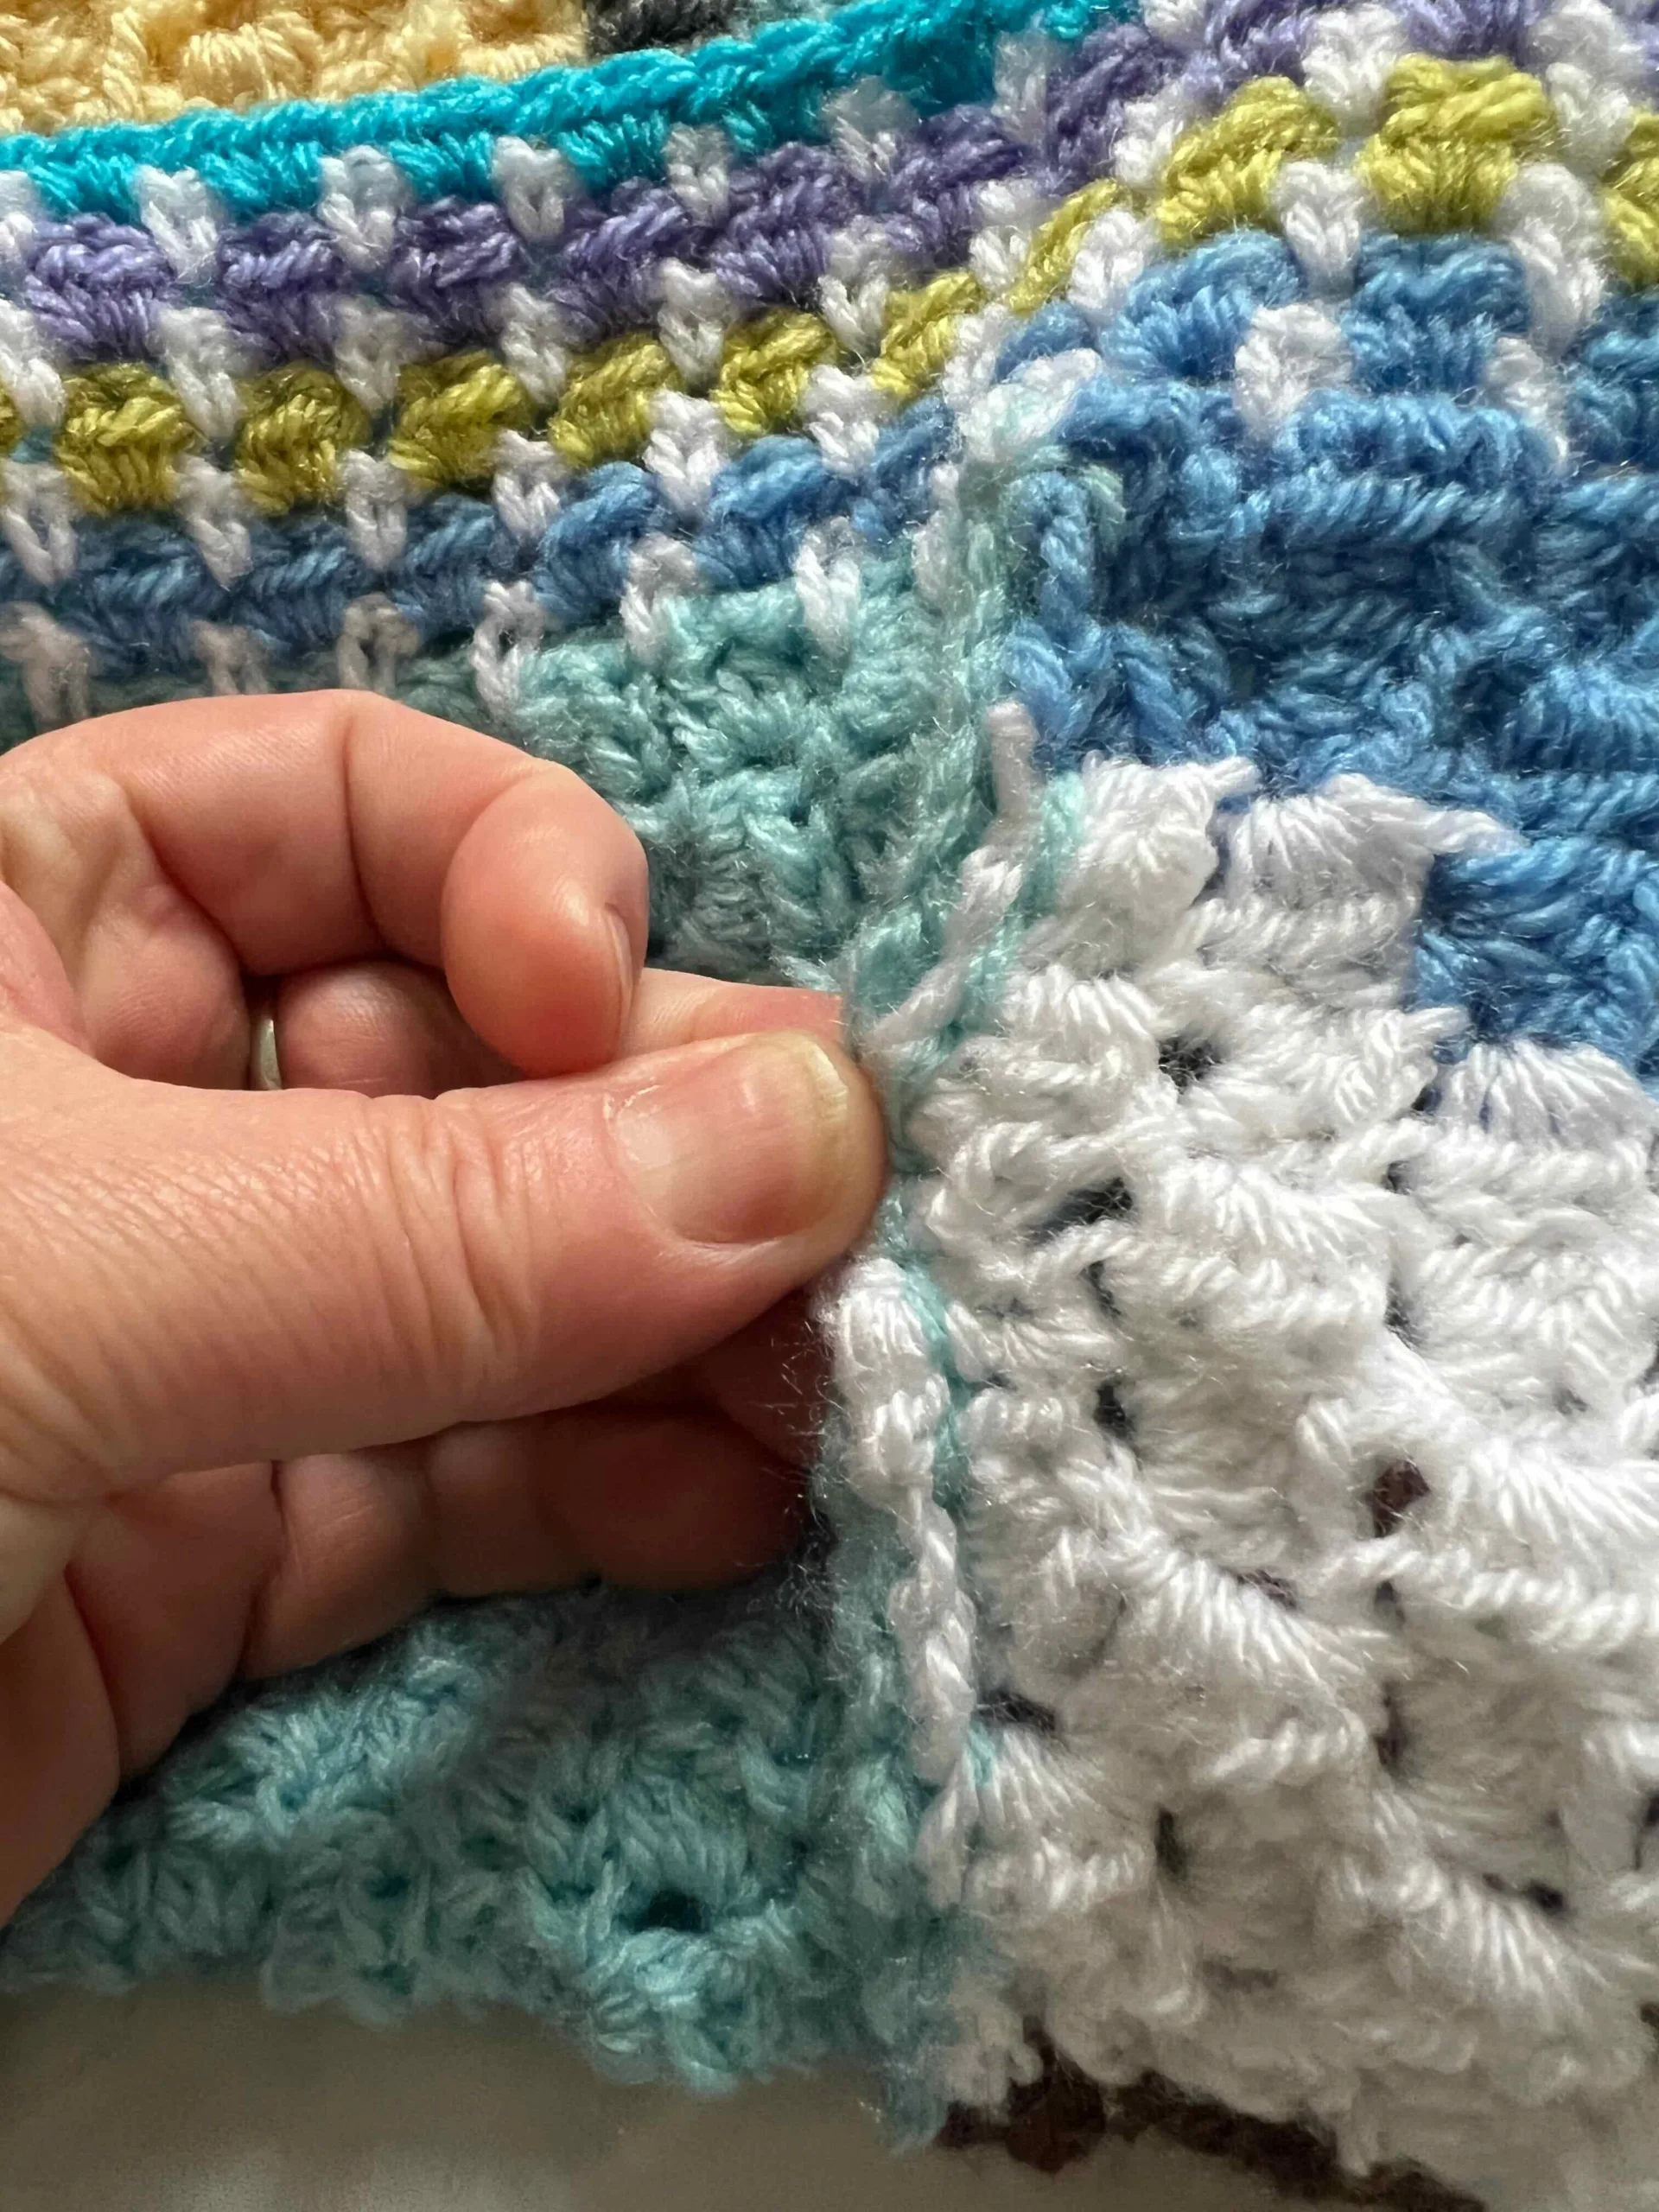
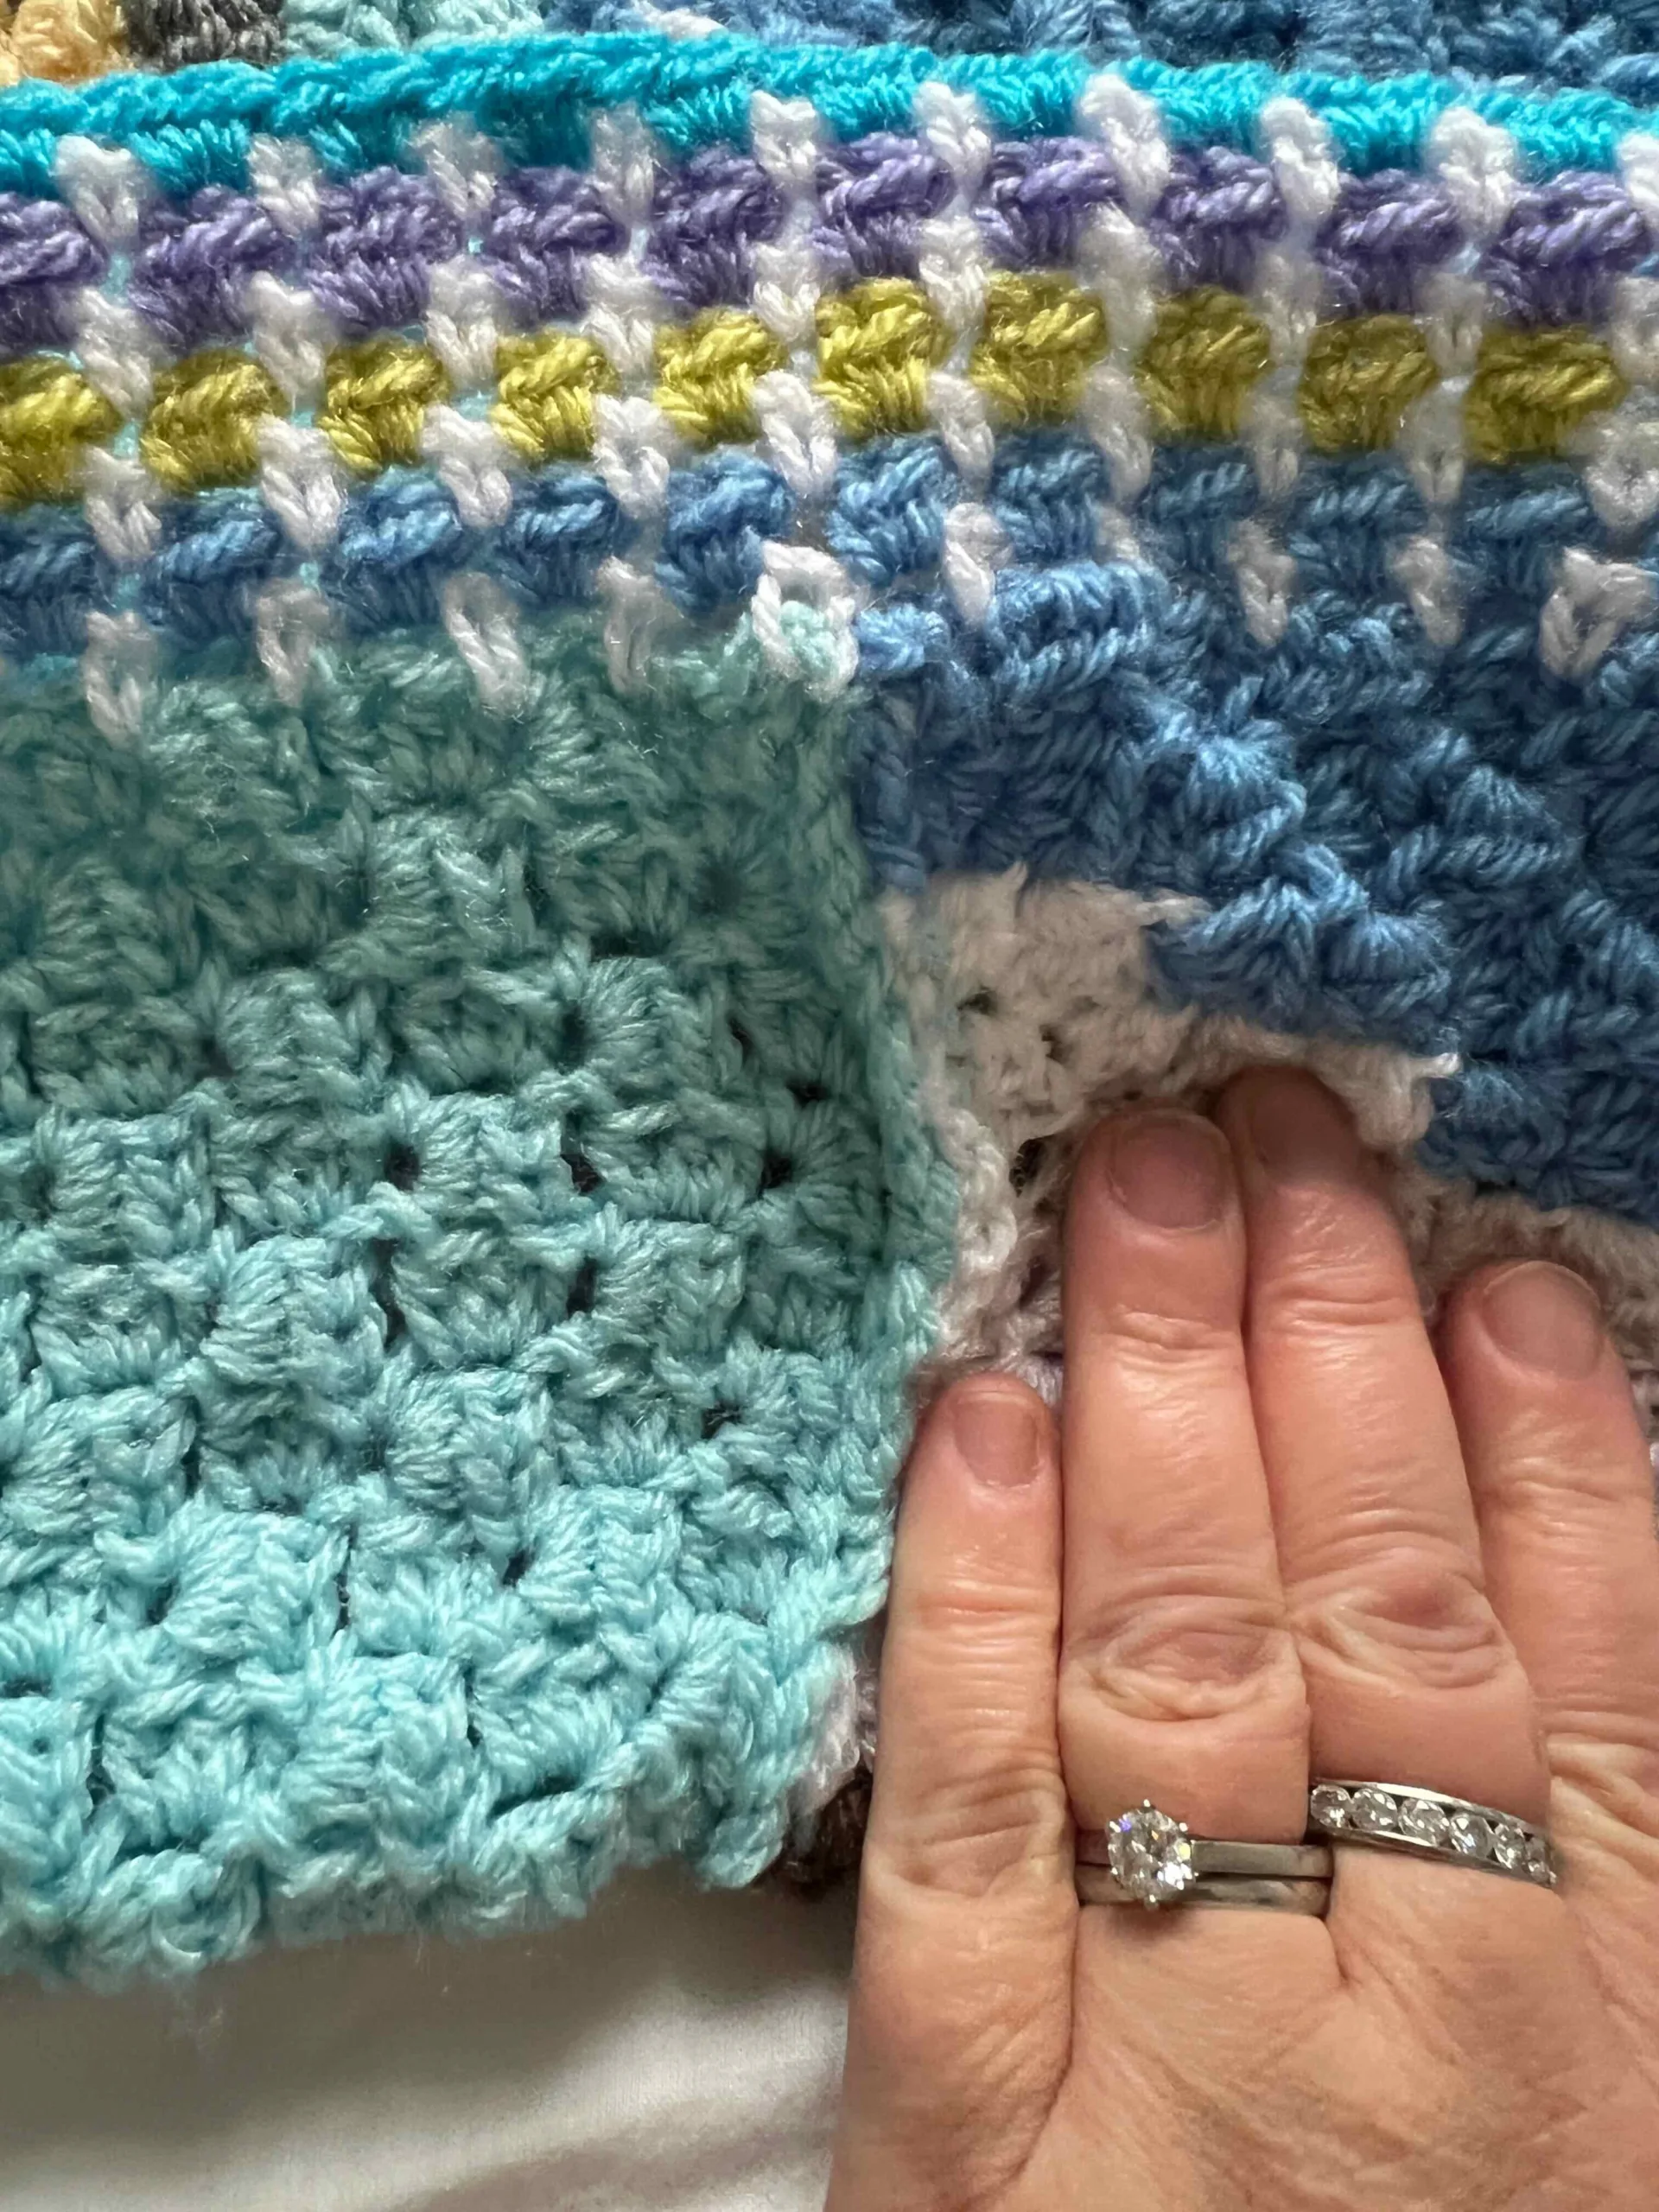
For the guinea pig squares (and Harry Potter blanket), I joined these together by placing the right sides together, then crocheting them together using Slip Stitches through the top of the C2C/ Ch2 gaps, to give a flat seam when turned the right way round.
The key things to note:
Choose the colour yarn that will be less noticeable. e.g for January joining, the borders would be on to February and May.
See below, I’ve used the same colour as the square on the left to join to the one on the right.
The seam is only seen on the right hand square, and blends completely with the left square.
The back of the blanket, placing right sides together, then slip stitching down the seam in a colour wool that is the same as one of the squares (so it’s not noticeable).
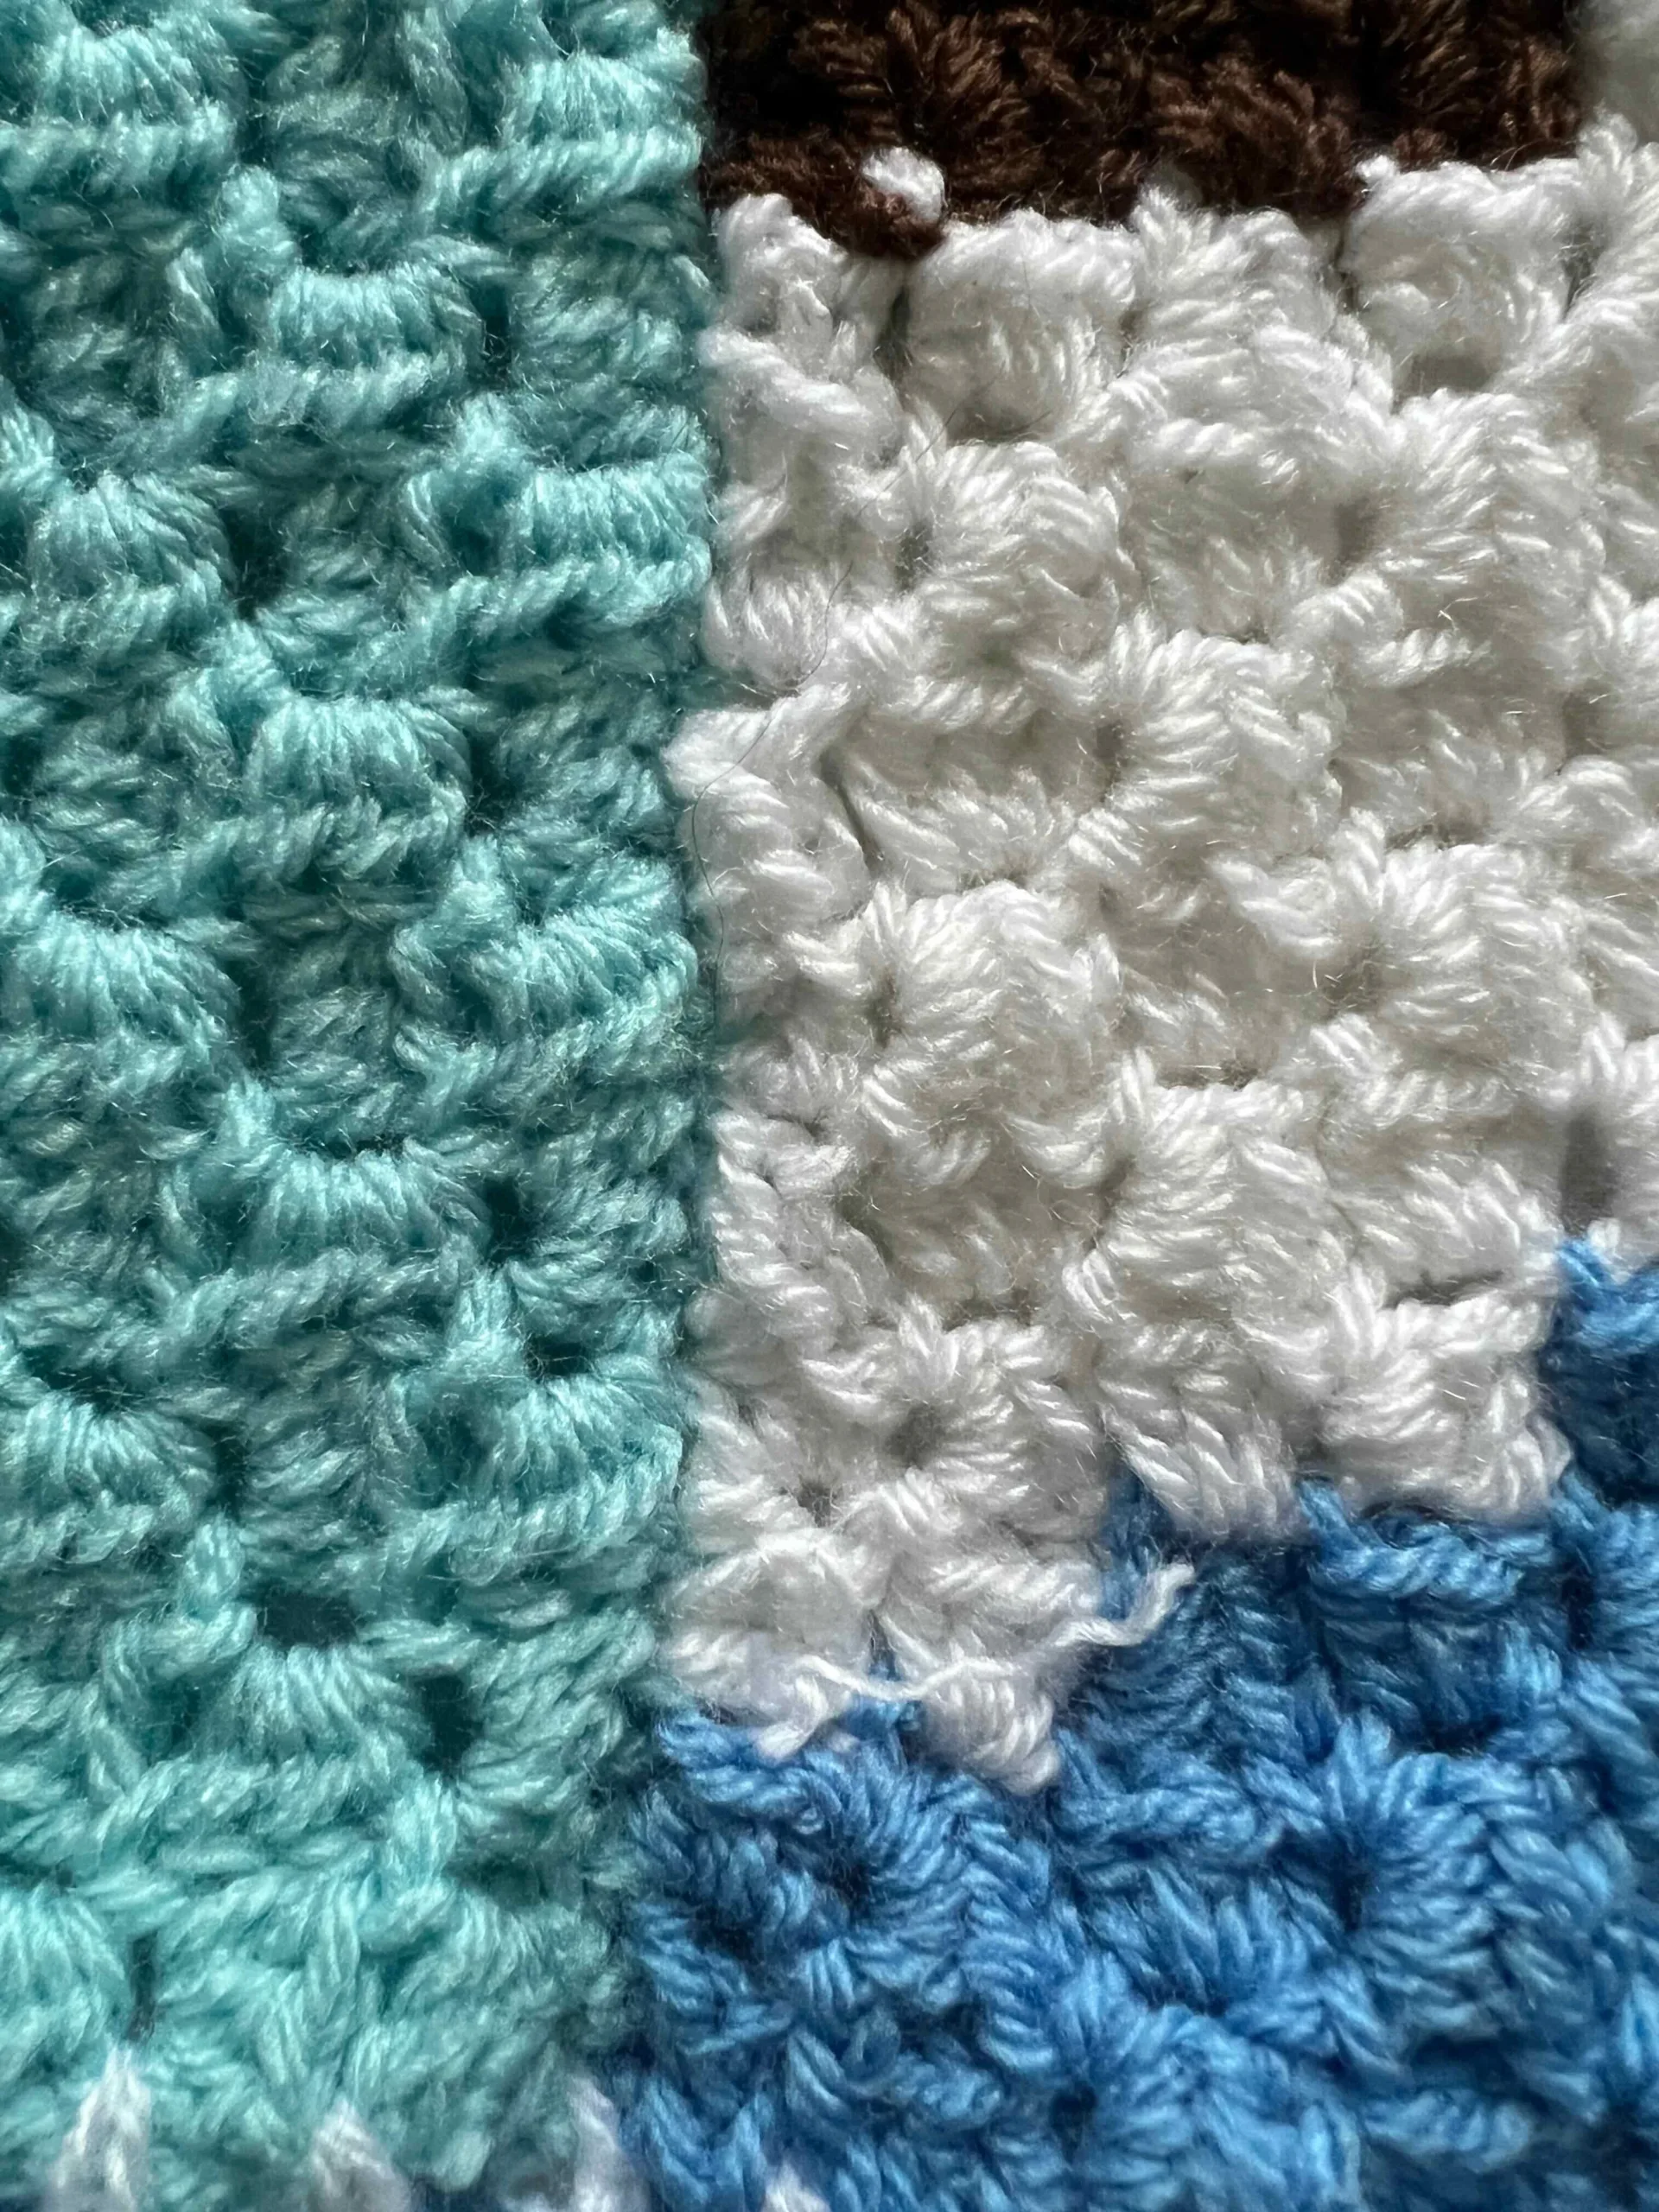
The photo above shows the front side of the blanket, where you can’t see the seam or the coloured join.
Step by Step to Join the Guinea Pig Blanket
- Line up all squares in order
- Pick up the 2 squares that are next to each other
- Place the right sides together
- Using the dominant colour of yarn of the squares edge, join together using Slip Stitches in the top of the HDCs and the Ch2 spaces.
- Fasten off, weave in ends.
- Repeat for all squares
Adding a crochet border
Learn about different crochet borders here
Thanks for visiting – I’d love to stay connected with you so please sign up for my email list where a free PDF pattern is waiting for you (just so you can see what my PDF patterns are like).
Finished one of my crochet pattern makes? I’d love to see it and so would the world, so get sharing! You can find me in the following ways:
- Follow me on Pinterest
- Join my new Facebook group
- Share a picture on Instagram and tag me #offthehookforyou
- Share your projects on Ravelry
- Share your projects on LoveCrafts
Disclaimer
This post may contain affiliate links which I earn a small commission from if you choose to click and purchase anything from. You pay the same price, I get a very small amount for sending you their way. It helps me to make my crochet patterns free on the blog.