Now here is something I didn’t think I would ever be making, a crochet sofa arm rest cover, that fits a sofa or armchair to protect the arms.
Crochet is perfect for making crochet sofa arm covers as you can change the size and colours to make these ideal for Armrest covers on chairs as well as sofas.
This post describes how I made my sofa arm cover, which may be different for you depending on how wide/ low/ long your sofa arm is!
You can find all the information and the pattern I used here for free, you may need to adjust it slightly as every sofa/ Armchair will be a different size.

Why crochet a Sofa Arm Cover?
I wanted to protect the arm of of my sofa, and by crocheting it I knew I could get the perfect FIT.
Here’s the thing, every sofa/ chair has a different sized arm, so you can’t usually buy straight from a shop.
This is where crochet is a winner and especially granny squares!
Not sure how to crochet a granny square? I have a complete beginners tutorial
>>>Click here to learn how to make a granny square for absolute beginners


What size should you make a sofa arm cover?
You need to measure your sofa arm!
The width on the top of the sofa arm or armchair arm, is the middle row of squares (the 4 in a line) in the diagram below.
To get a snug fit, measure the top of the sofa arm, and make sure your granny squares are the same size across (if not a little smaller) as the width of your sofa arm or armrest.
The 2 rows of 3 squares with the “A” next to them, are the sides of the sofa arm cover.
Ideally these granny squares will be the same the size as the ones on the top, to make sure you can join them together so they all line up.
As a guide, my sofa arm was the same as 6 rounds for a granny square.


Get the free pattern for the one ball granny make here>>>

How I made my Crochet Sofa Arm Cover
I made a 7 plain grey squares of 6 rounds each using a 4mm hook and DK yarn, then decided it needed a bit of colour!
I dug into my ever growing stash and found some blues that I quite liked.
So rounds 1 and 2 made in blue for 3 squares, which I positioned on the Right hand end, to make them on the end of the sofa arm cover.

Then to sew/ crochet them together, I used Slip Stitching (SS) with the Back Loop Only (BLO) to give a flat look.
But you could use – Continuous join as you go, to make the last round 6 the joining round.
>>>Learn how to continuous Join as you go

You need to sew them together in the following way. What I forgot to add on the diagram, is the blue squares are the last vertical line to the right!
See more free granny square patterns here>>>
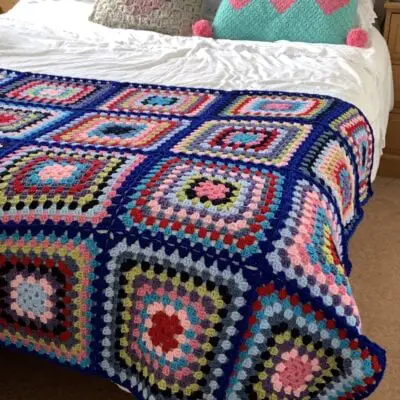
Then, a bit more colour needed, so I did one row of US single / UK double crochet around the whole edge in the light blue followed by a row of HDC/ HTr in the darker blue, and hey presto…….

One very retro sofa arm cover.


Join me at Off The Hook For You to share your crochet!
Thanks for visiting – I’d love to stay connected with you so please sign up for my email list where a free PDF pattern is waiting for you (just so you can see what my PDF patterns are like).
Finished one of my crochet pattern makes? I’d love to see it and so would the world, so get sharing! You can find me in the following ways:
- Share a picture on Instagram and tag me #offthehookforyou
- Share your projects on Ravelry
- Share your projects on LoveCrafts
Disclaimer
This post may contain affiliate links which I earn a small commission from if you choose to click and purchase anything from. You pay the same price, I get a very small amount for sending you their way. It helps me to make my crochet patterns free on the blog.