Thanks for popping by, Here you can find all the details and the links needed to make a great stash busting crochet granny square blanket. One, who doesn’t love a granny square? Two, you really can’t beat a stash buster, and three, you get yourself a huge colourful blanket at the end.
What you need to know the #Nobrainer CAL – granny square blanket?
This is a blanket made from a classic granny square. Yep – the perfect beginners crochet project as they teach you so many crochet tips.
If you are new to granny squares – you are in luck – I have an absolute beginners guide to granny squares here
As I said in my last post (where all the colours I used are listed) the aim of this project was:
- To make a blanket that didn’t use white.
- That was a yarn stash buster.
- That required little thinking (hence the granny square)
- That made a pretty big crochet blanket

There really is nothing better that a classic retro granny square- think crochet – you will almost certainly think granny square.
Each colour is used once per square – but not the outside colour – save that for the joining.
In my case – the Royal is the joining colour (The large ball to the right of the picture above).
So – do you want to see my finished blanket?
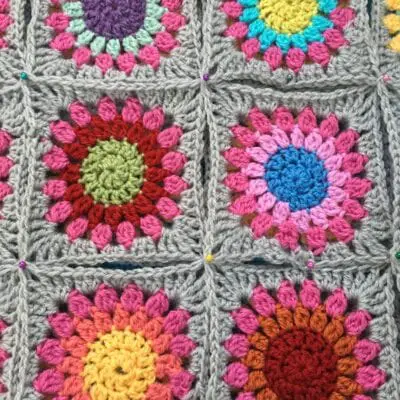
Just look how bright and colourful it is!
>>>Get the free pattern for the Heart Cushion here

I have to say – I’m so so happy with this blanket. When you have an idea, and then it just “works” – I’m a super happy crocheter.
So if you are using yours stash, or buying new yarn the rules are the same:
9 colours and 1 colour for joining. I’ve used stylecraft yarn – as that was in my stash.
I used a 4mm hook as I’ve just DK yarn, but you can do this pattern with any yarn, just use the appropriate hook for the yarn (as found on the ball band)
The granny squares are made in what I see as the traditional way (ch2 in the corners, no turning):
Traditional granny square pattern – (USA terms)
Round 1: With first colour, Chain 4, SS to join to make a circle. Chain 3 (Counts as the first DC throughout), 2 DC, ch2, *3DC, ch2* – *repeat 3 times, SS to to the top of the ch3 to join.
Round 2: SS over to the first ch2 space. Ch3, 2 DC, ch 2 3DC in the same space. *Ch1, 3DC ch2 3 DC in the next sp * repeat 3 times, SS to join. Fasten off, weave in ends.

Round 3 : switch to colour given, Join Yarn in a corner space, Ch3, 2 DC 2ch 3DC ch1, 3DC ch1, *3DC ch2 3DC ch1, 3DC Ch1 * repeat 3 times SS to join, fasten off, weave in ends.
Round 4 and all rounds onwards : switch to colour given, join yarn in a corner space, Ch3 2 DC 2ch 3DC ch1, (3DC ch1) in each side space. (3DC ch2 3DC ch1) in each corner space.
Continue to round 10, changing colour every round (apart from rounds 1-2)
What else do you need to know?
My squares will be released on a Sunday morning UK time, they are what I have made, and will come 2 squares at a time, showing what they are and what order of the colours I used.
NOTE – if you are finding this later – all colour orders and joining info can be found here
Please tag me in social media – I’d love to share your #nobrainerCAL photos and colour choices along the way.
If you fancy saving this Pin for later (on Pinterest) – you can pin the blanket here!

Join me at Off The Hook For You to share your crochet!
Thanks for visiting – I’d love to stay connected with you so please sign up for my email list where a free PDF pattern is waiting for you (just so you can see what my PDF patterns are like).
Finished one of my crochet pattern makes? I’d love to see it and so would the world, so get sharing! You can find me in the following ways:
- Join my new Facebook group
- Share a picture on Instagram and tag me #offthehookforyou
- Share your projects on Ravelry
- Share your projects on LoveCrafts
Disclaimer
This post may contain affiliate links which I earn a small commission from if you choose to click and purchase anything from. You pay the same price, I get a very small amount for sending you their way. It helps me to make my crochet patterns free on the blog.


