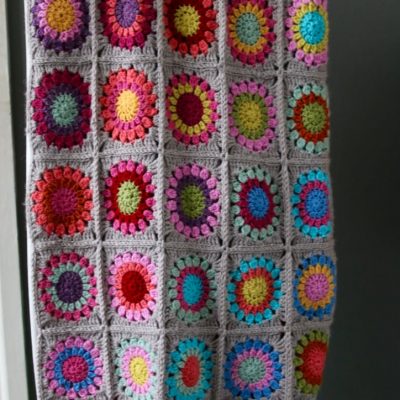
I’ve admired crochet wreaths for a long time, so thought I’d have a go at making one in my own design. This post will describe how to crochet a wreath base, whether this is a polystyrene base, or cardboard, or some other options you can use.
Specifically this post is written for the Summer Wreath Pattern, but can be used to crochet any type of wreath.
Just take some yarn, a polystyrene base, and just look at what you can crochet!
If you want to save this for later please Pin it below
Different Crochet Wreath Bases
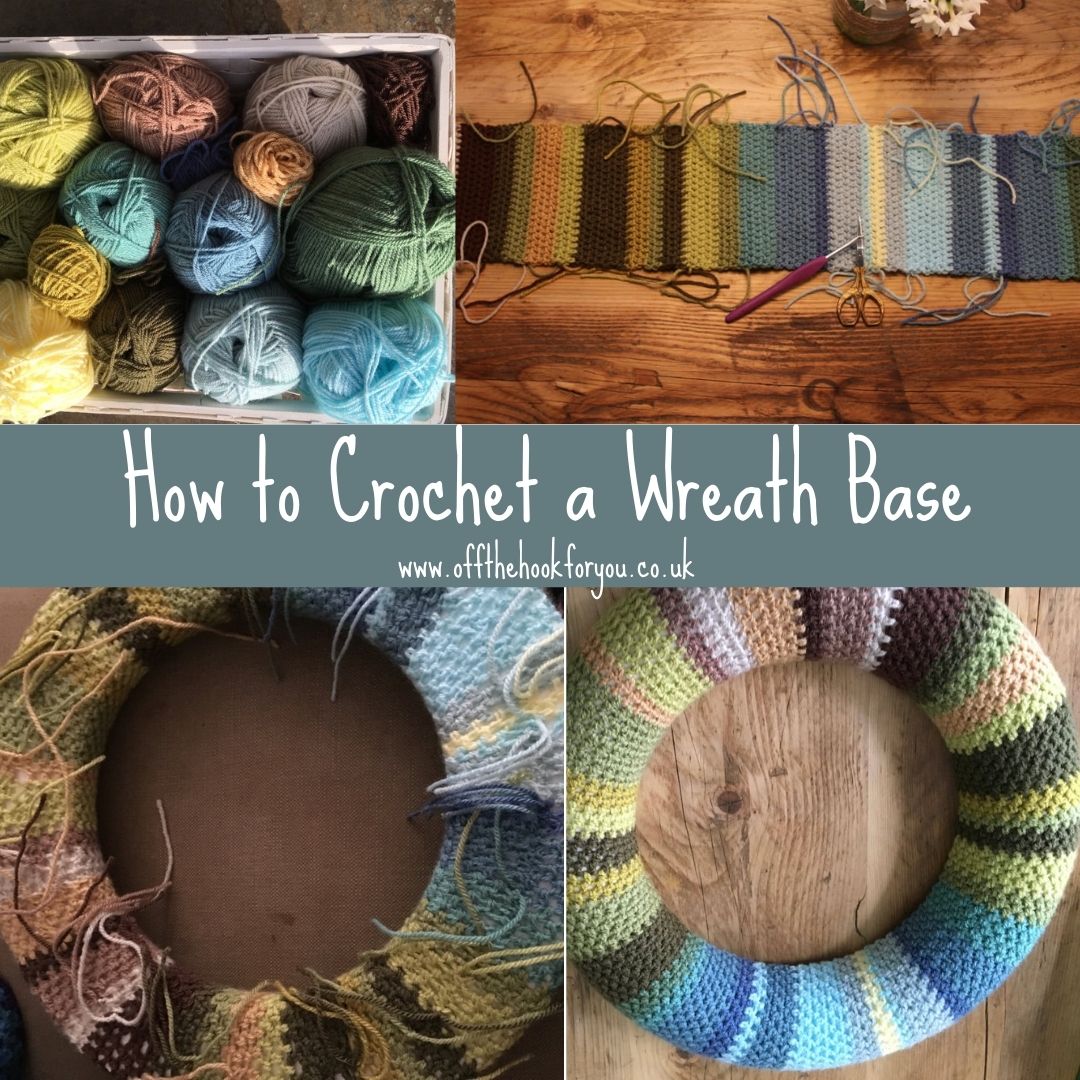
Most crochet patterns, including mine, use a polystyrene circular base.
I’ve used the larger 29.7cm size, and make sure you get one with a flat back!
>>> Have a look at wreath bases here
You can use other things, like a circle of cardboard, with a hole cut out of the middle.
But I very much recommend buying one of the polystyrene bases, as they look so much more professional for a few £ / $.
Another option, and Kate who designs at Just_Pootling uses these a lot are a wicker wreath base. This will give you a totally different effect, but worth investigating if you are looking for inspiration.
Other tools
If you are going for a covered ring, you’ll need
Yarn
Crochet hooks
Scissors
Yarn needle
How to Crochet a Wreath Base
For this tutorial, I’m going to give you the exact pattern I’ve used for my summer crochet wreath, but this can be modified for any colours.
>>>Get the Summer Crochet Wreath Pattern here
Yarn
I used Stylecraft Special DK, as it’s an affordable, acrylic yarn. I’ve listed my exact colours below, and how many rows of each colour to crochet.
Go straight to the yarn colours here
Which Crochet Stitch to use for a wreath?
The lazy crocheter in me struck again here. A lot of people use Single crochet, for the base, but it grows so so so slowly.
I will always use Half Double Crochet for a wreath base, when using DK yarn. It gives a nice close texture, but also be twice as fast as Single Crochet.
>>> For a super quick crocheted wreath base click here
>>>For super quick crochet patterns click here (The lazy crocheter)
How to Plan Your Crochet Wreath
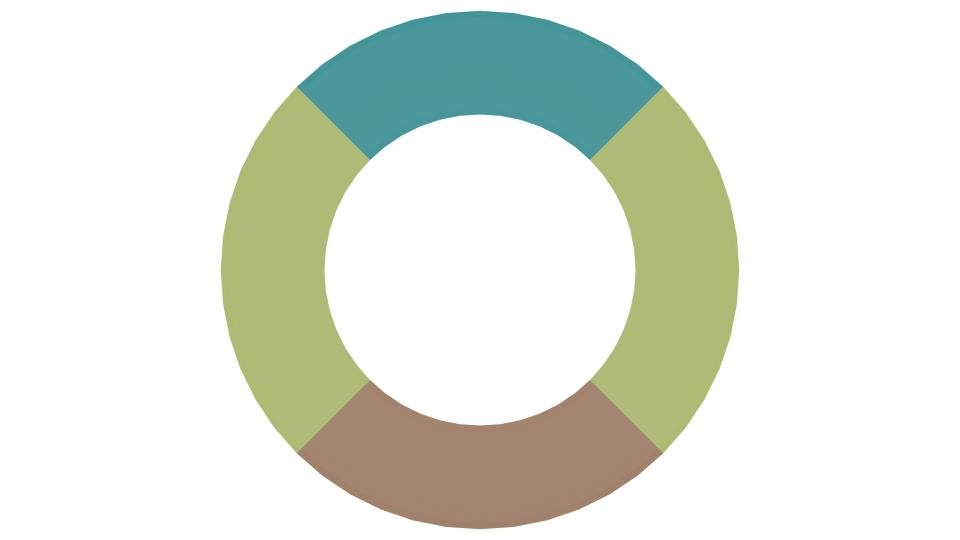
For my summer wreath, I wanted to use the colours of the earth, leaves and sky.
I planned that the sky section would be visible in this wreath, so when I set about crocheting the base, I had this plan in my head.
Yarn Colours
As mentioned before I used Stylecraft Special DK, as it’s basically what my stash is made up from! It comes in 101 different colours, but there are lots of other options too.
>>>See the Stylecraft Special DK colours
As my inspiration for the summer wreath was the earth, leaves and sky, I needed browns, greens and blues.
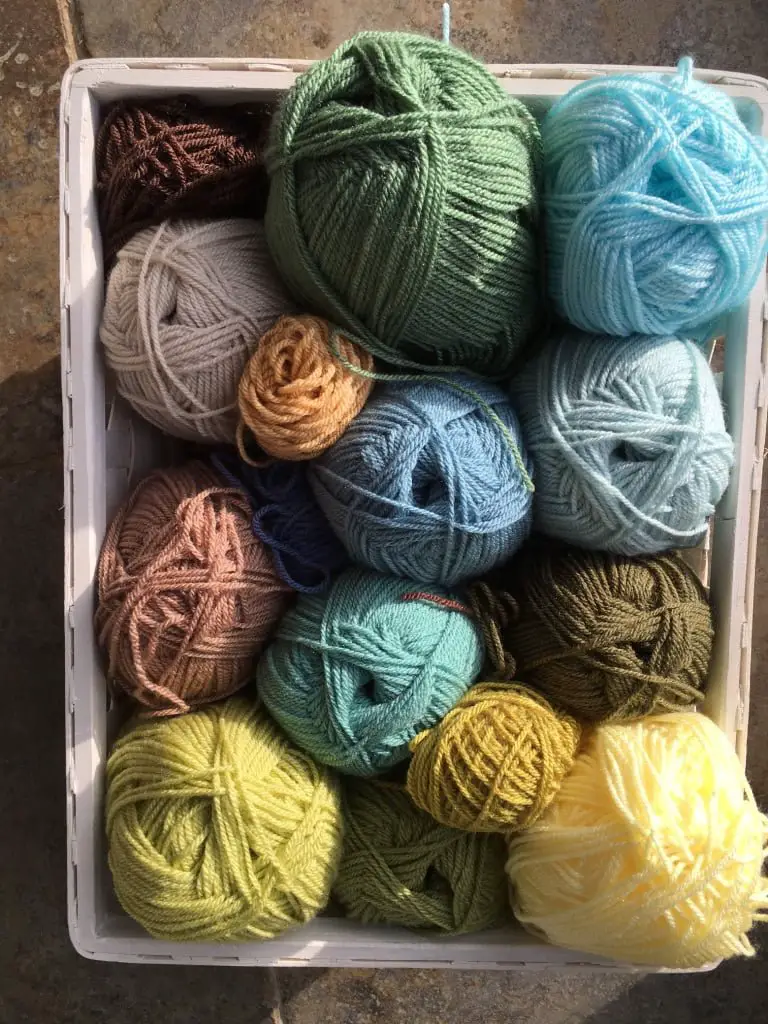
I used the following colours
| Parchment | 1218 |
| Mocha | 1064 |
| Meadow | 1065 |
| Pistachio | 1822 |
| Khaki | 1027 |
| Lime | 1712 |
| Dark Brown | 1004 |
| Duck Egg | 1820 |
| Sherbert | 1034 |
| Storm Blue | 1722 |
| Denim | 1302 |
| Stone | 1710 |
| Sage | 1725 |
| Cypress | 1824 |
| Walnut | 1054 |
You will only need about 5-10g of each colour (so if you can – raid your stash!)
Tension/ Gauge
I didn’t measure my tension or gauge, but to size the width (the bit that is wrapped around the wreath), I crocheted some stitches (Foundation half Double Crochet) , then made sure it would stretch (another reason to use acrylic yarn), and meet the other side enough for me sew it together.
It should fit snuggly, stretching it slightly, not loose at all. Check again after about 5 rows. You are looking for a width of about 16-18cm (6 1/4 to 7 inches).
Hints and Tips
Do not sew in the ends. Use these to sew the wreath together once you have to got the correct length of crochet strip.
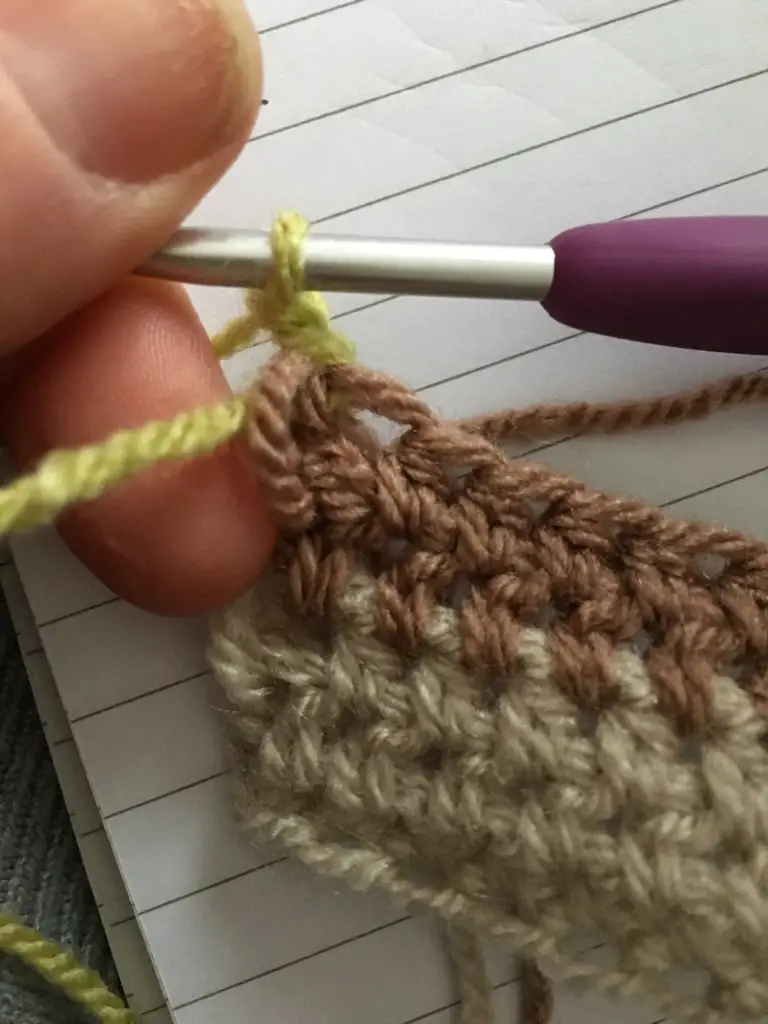
The Ch2 at the beginning counts as stitch throughout.
To change colour, do the last yarn over of the final stitch of the row in the new colour.
Tips for Crocheting Straight
Ideally you’ll have a completely straight piece of crochet fabric when you’ve made the wreath base. If you find you don’t, here are a couple of tips.
Put a stitch marker in the ch2, this will remind you to make a stitch in the top of the chain 2.
Lay your work down occasionally, as its’s easier to see if you are going wonky with your work flat.
Count your stitches for every row (boring- but you will work straight!).
If you do notice you’ve missed a few, you can always do 2HDC in the last stitch on a few rows to make it bigger again!
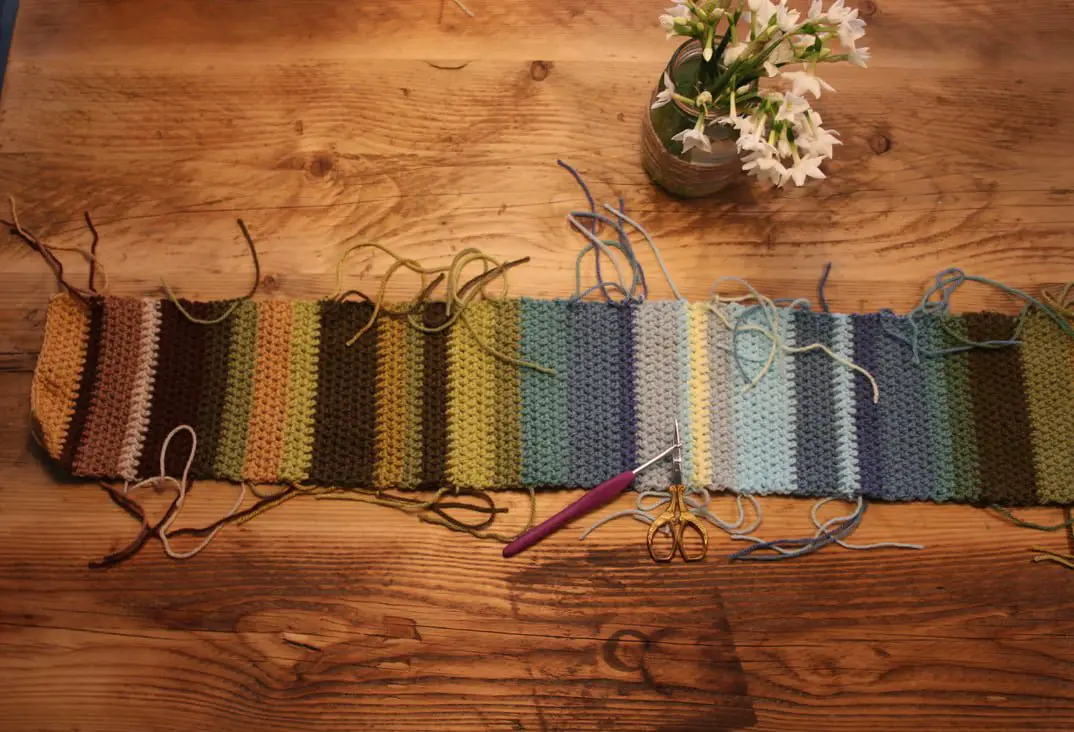
Crochet Wreath Base Pattern
Row 1: With a 4mm (G) hook and Parchment, Foundation Half Double crochet 22 stitches. Check sizing around your ring. If it fits snuggly., carry on, but you may need to adjust this number of stitches depending on your tension/ gauge and the yarn you are using. You are looking for a width measurement of about 16-18cm (6 1/4 to 7 inches).
Row 2: Ch2, HDC across. Turn.
Repeat row 2 until the crochet panel reaches around the ring. This was 161 rows for my base.
To make the base exactly like my summer wreath change yarn to the following colours on the following rows.
| 1-3 | Parchment |
| 4-5 | Mocha |
| 6-10 | Pistachio |
| 11-12 | Stone |
| 13-20 | Meadow |
| 21-24 | Lime |
| 25-28 | Pistachio |
| 29-32 | Khaki |
| 33-36 | Lime |
| 37-41 | Meadow |
| 42-49 | Khaki |
| 50-53 | Cypress |
| 54-56 | Sage |
| 57-62 | Storm blue |
| 63-65 | Denim |
| 66-67 | Sherbert |
| 68-72 | Storm blue |
| 73-79 | Sherbert |
| 80-82 | Duck Egg |
| 83-84 | Lemon |
| 85 | Sherbert |
| 86-90 | Duck Egg |
| 91-91 | Denim |
| 93-98 | Storm blue |
| 99-102 | Sage |
| 103-105 | Meadow |
| 106-110 | Pistachio |
| 111-114 | Khaki |
| 115-116 | Meadow |
| 117-119 | Lime |
| 120-126 | Khaki |
| 127-129 | Pistachio |
| 130-133 | Stone |
| 134-136 | Meadow |
| 137-139 | Khaki |
| 140-145 | Walnut |
| 146-147 | Parchment |
| 148-153 | Mocha |
| 154-155 | Dark Brown |
| 157-161 | Stone |
Sewing the crochet base
Read below or scroll for the video
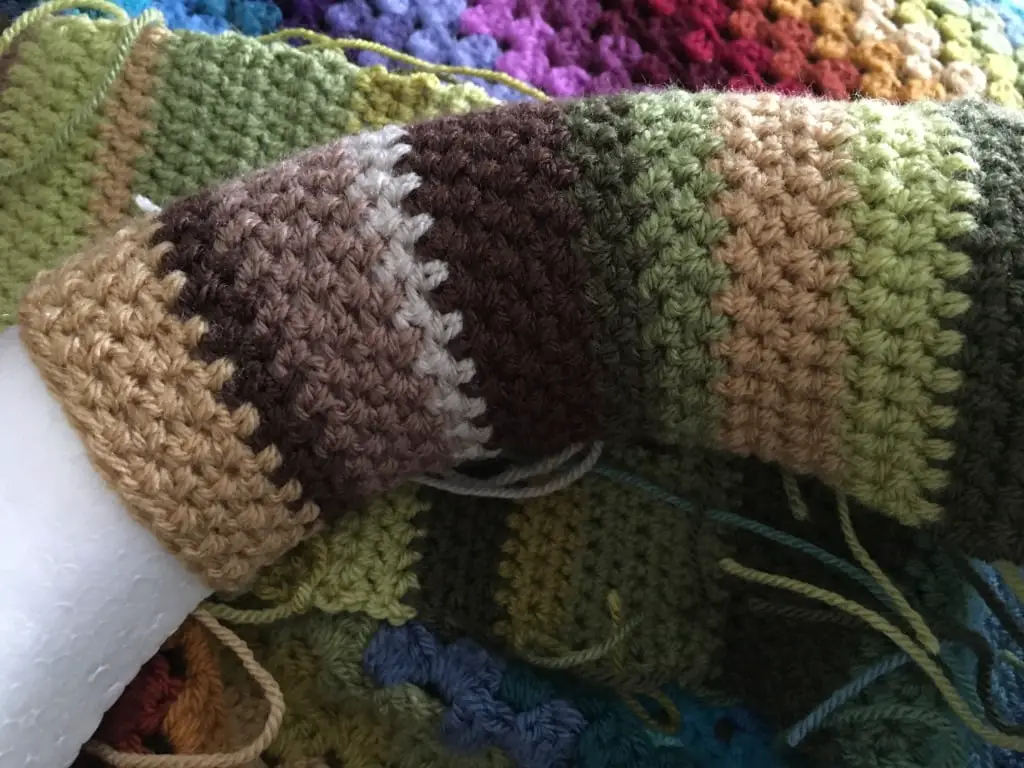
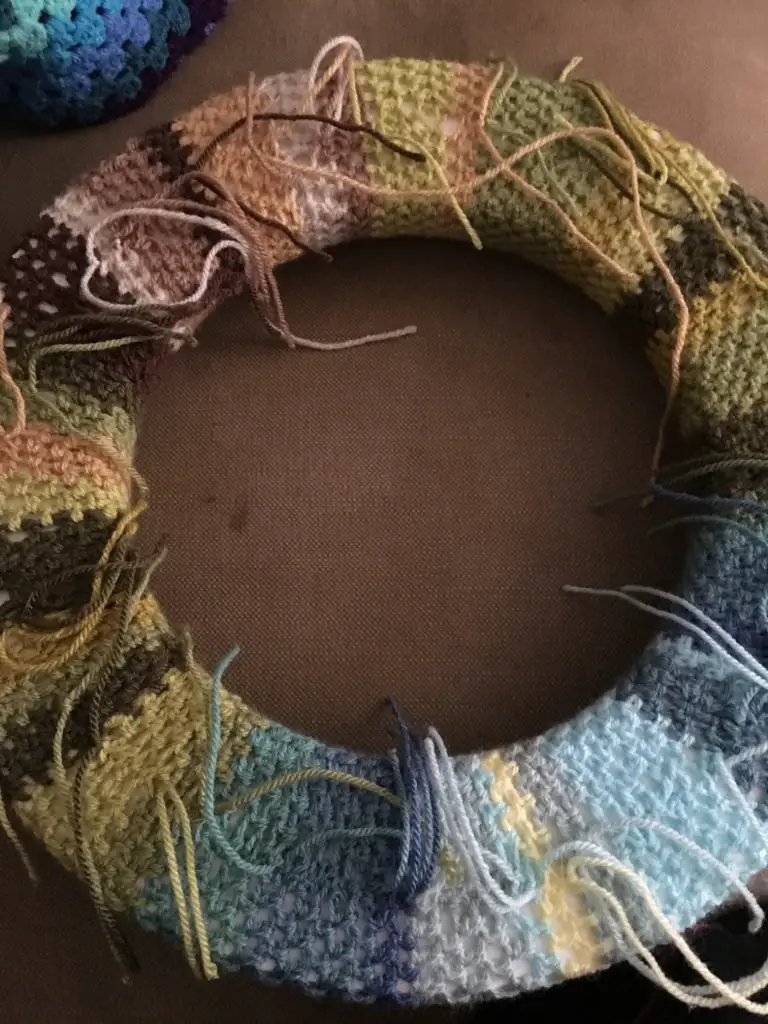
First, you need to join the two ends of the crochet strip together. I do this by folding the crochet in half, then slip stitching in the back loops only to join to make a circle.
Next, position the crochet on the ring.
Wrap the crochet cloth around the ring, so the two ends meet on the flat edge.
This is where the ends you’ve left on your crochet really help you out!
Tie together at about 4 places around the ring the matching ends (think like a clock face – 12, 3, 6 and 9). This will help secure the crochet before you start to sew.
Using your yarn needle (and the ends) , sew the two matching colour stripes together. Fasten off, weave in ends.
Please Pin this for later above
Join me at Off The Hook For You to share your crochet!
Thanks for visiting – I’d love to stay connected with you so please sign up for my email list where a free PDF pattern is waiting for you (just so you can see what my PDF patterns are like).
Finished one of my crochet pattern makes? I’d love to see it and so would the world, so get sharing! You can find me in the following ways:
- Join my new Facebook group
- Share a picture on Instagram and tag me #offthehookforyou
- Share your projects on Ravelry
- Share your projects on LoveCrafts
Disclaimer
This post may contain affiliate links which I earn a small commission from if you choose to click and purchase anything from. You pay the same price, I get a very small amount for sending you their way. It helps me to make my crochet patterns free on the blog.