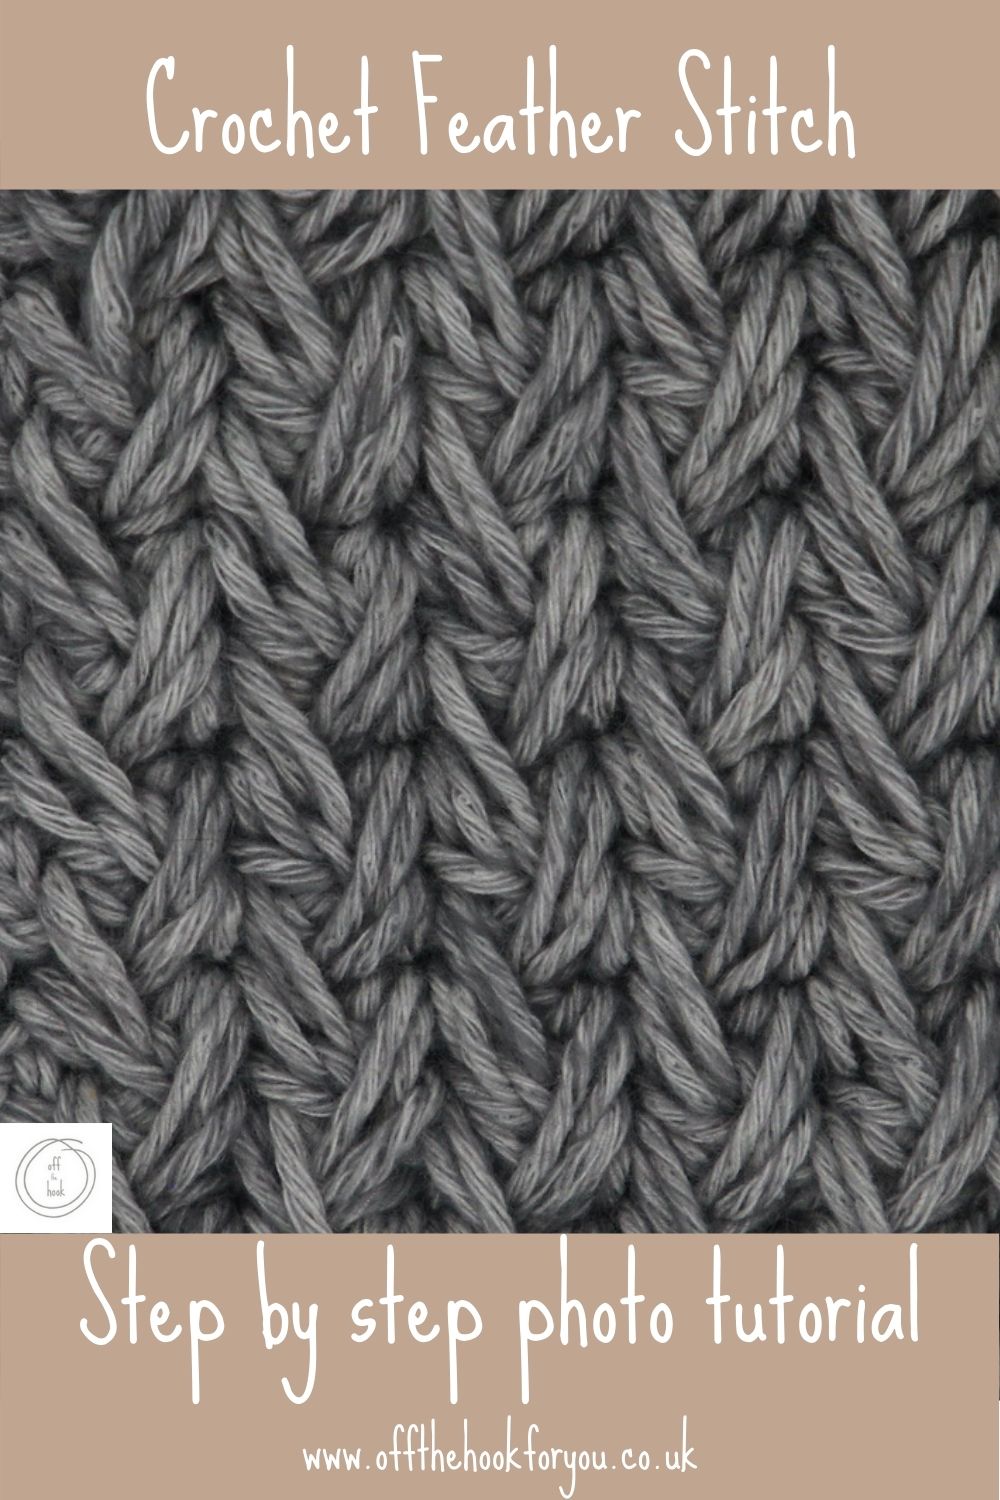
Today I have a photo tutorial of how to do the crochet feather stitch.
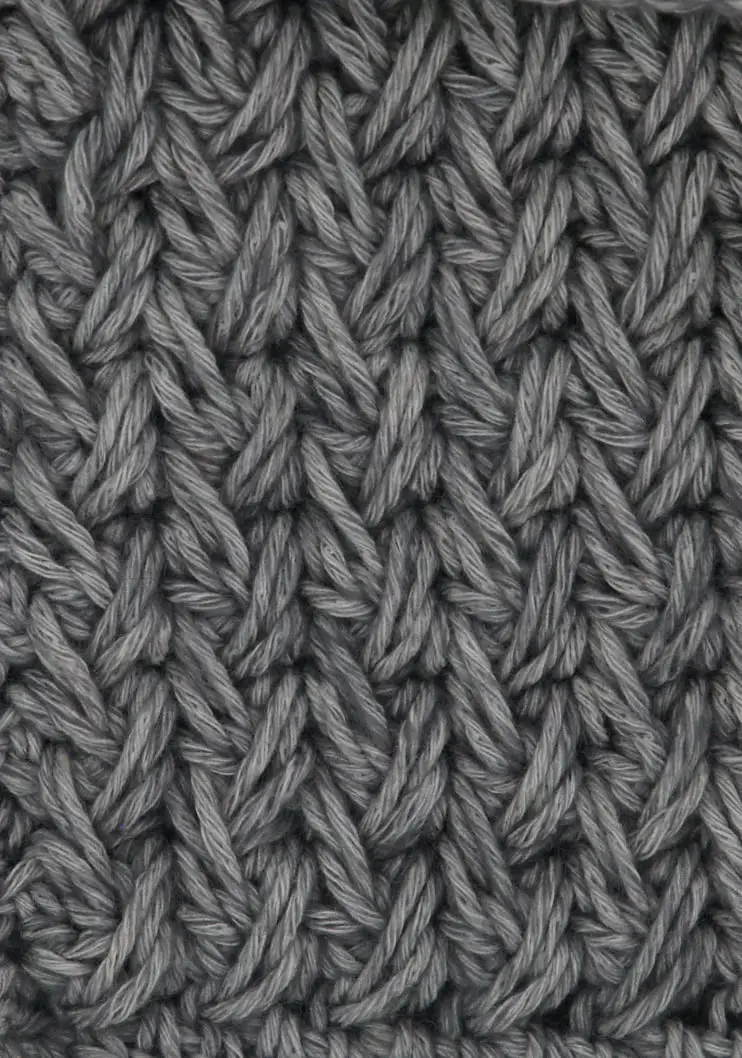
This is a really pretty stitch that funnily enough looks a lot like feathers all lined up!
It has the most amazing texture, and if you’ve been following me for a while, I’m all for crochet texture.
Normally I’d film a little tutorial for this on You Tube, but for this one, I actually think photos will show better where you need to make the stitches!
If you want to save this for later, please pin it below.
What you need
Any yarn and appropriate sized hook!
I’ve used Stylecraft Belissima in Bashful Blue for the photos as I adore the colour!
And of course, a Furls crochet hook
But you can use any yarn to do this.
Below is Scheepjes Stonewashed 4ply cotton
To start the Crochet Feather Stitch
You need to make a foundation row using Half Double crochet. If you don’t know how to Foundation Half Double Crochet, read more here

You need to make a multiple of 2 + 1
So in this case I’ve done 13 FHDC.
Next, Chain 1, HDC in the base of the chain, Ch1, [skip 1 stitch, HDC in the next stitch, Ch1] repeat this across.
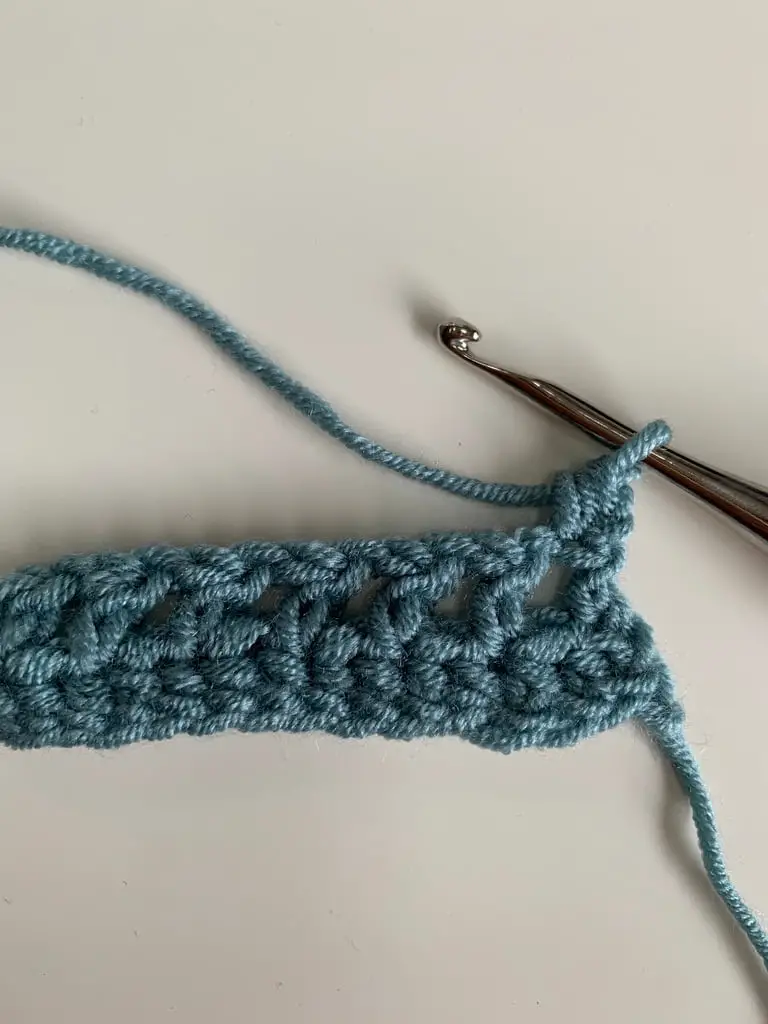
Ch1 (Does not count as a stitch), HDC in the bottom of the chain, Feather stitch.
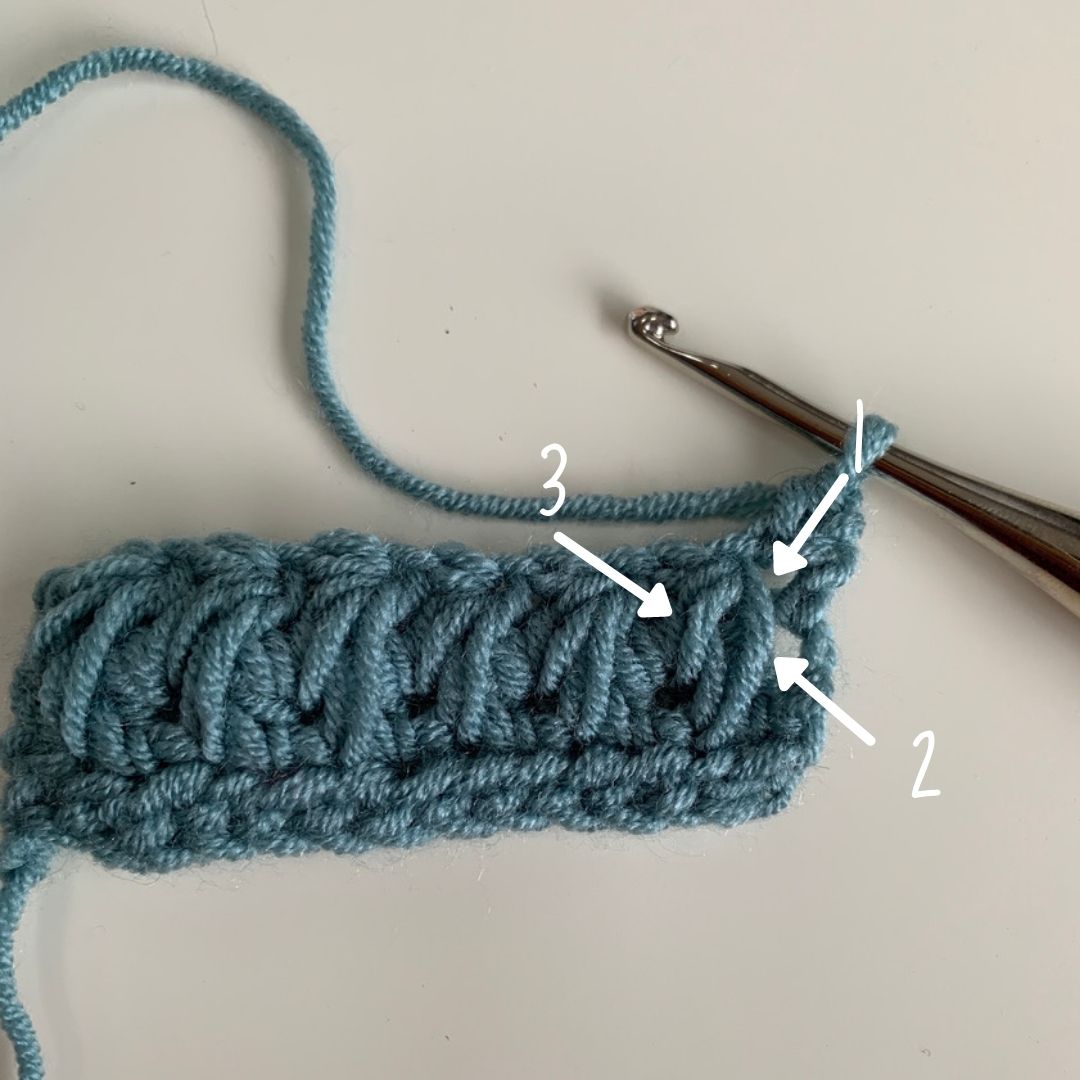
Row 1 of the Feather Stitch
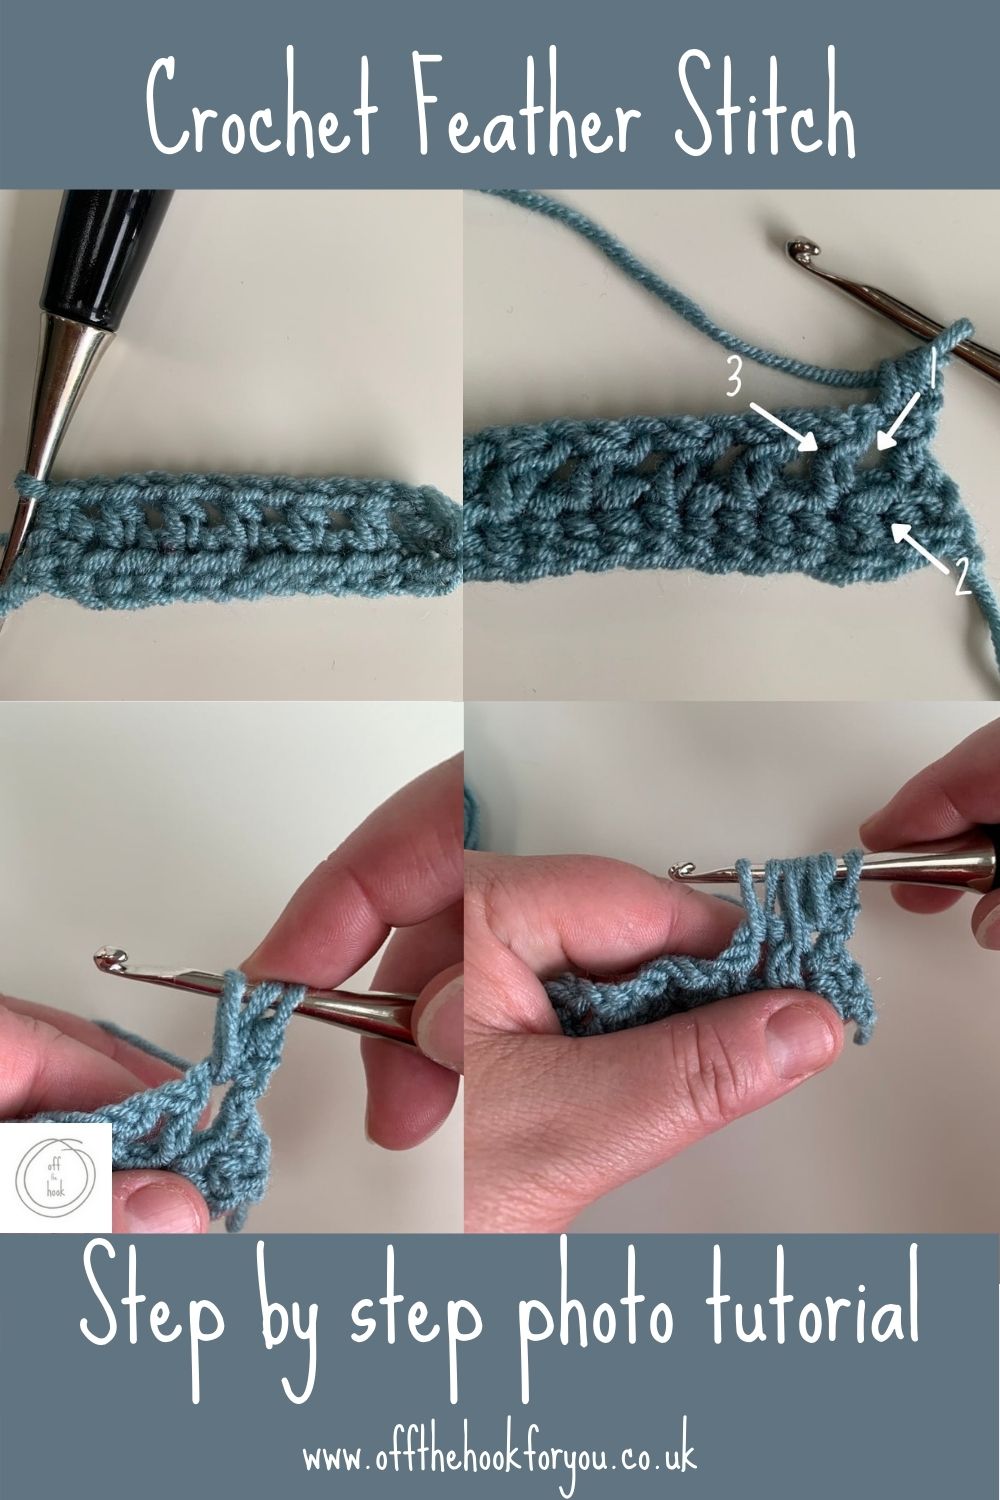
For the first row of the feather stitch, loops are pulled up through different parts of this chain we’ve just made.
The thing to note here, is to pull all the loops so they are the same height.
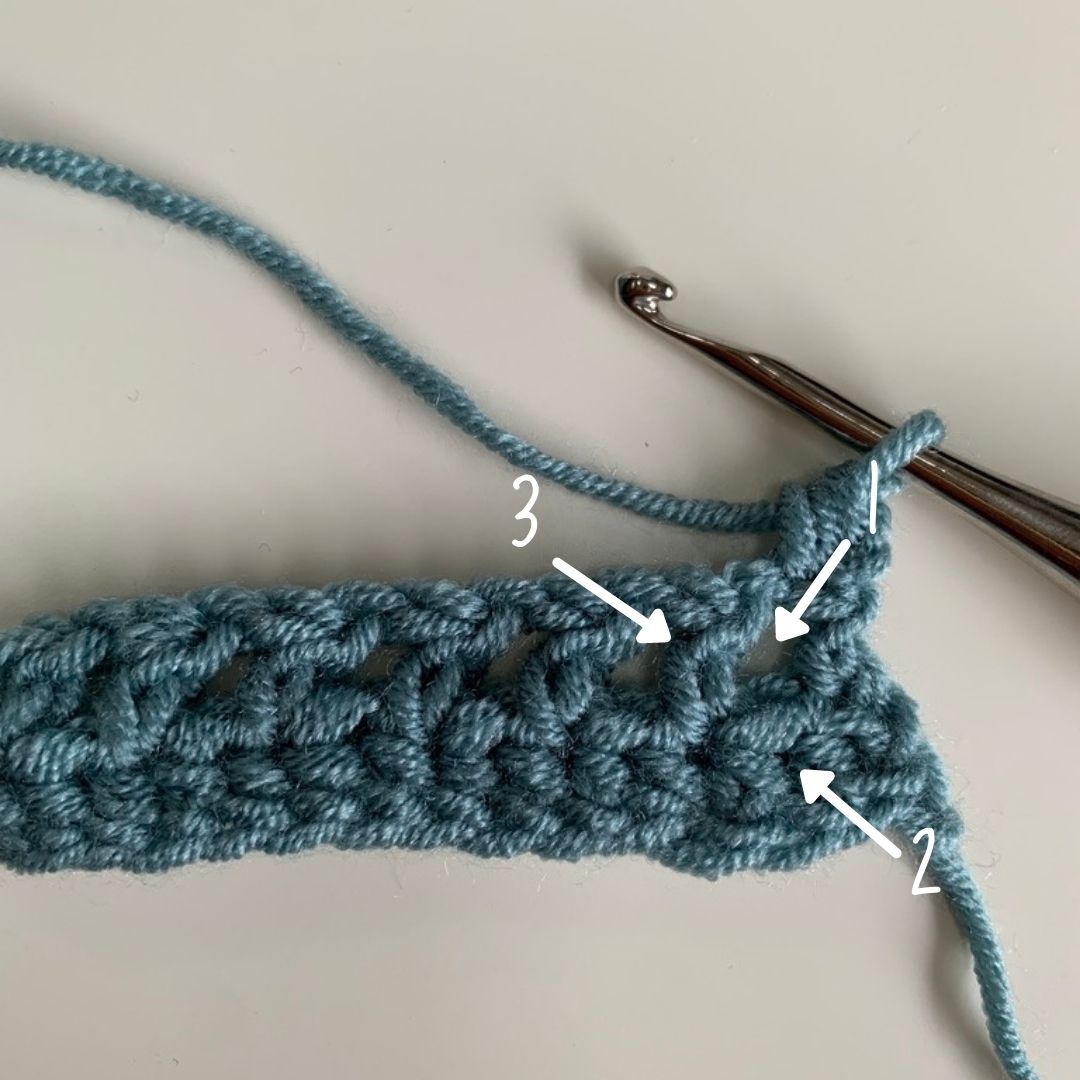
- Yarn over, go through the gap marked 1, pull up the loop (3 loops)
- Yarn over, go through the top of the FHDC of the row below, pull up the loop (make sure the same height as the previous loop) (5 loops)
- Yarn over, go through the space marked 3, pull up a loop to the same height as the loops before (7 loops).
- Yarn over, pull through all 7 loops.
- Chain 1
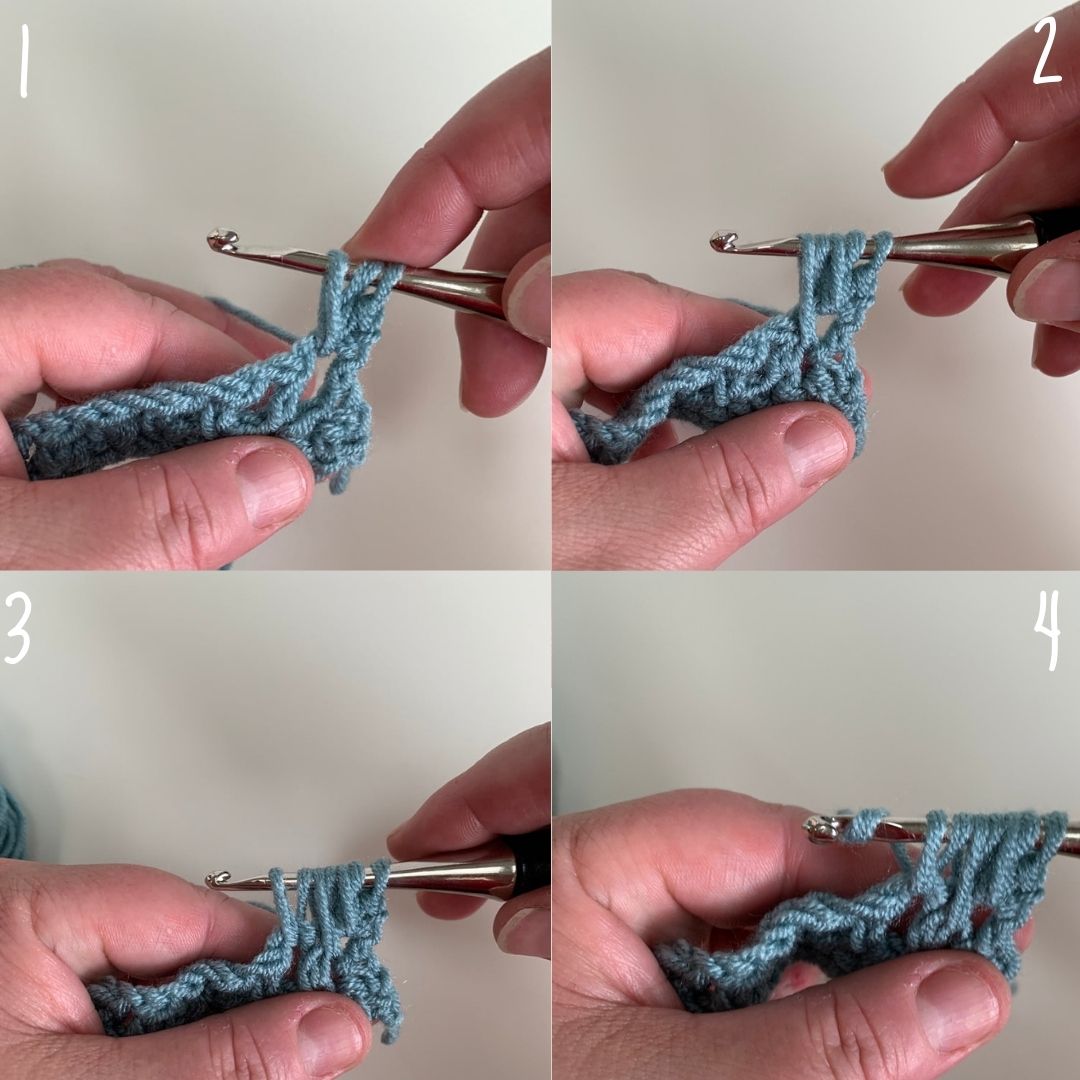
Thats one feather stitch made.
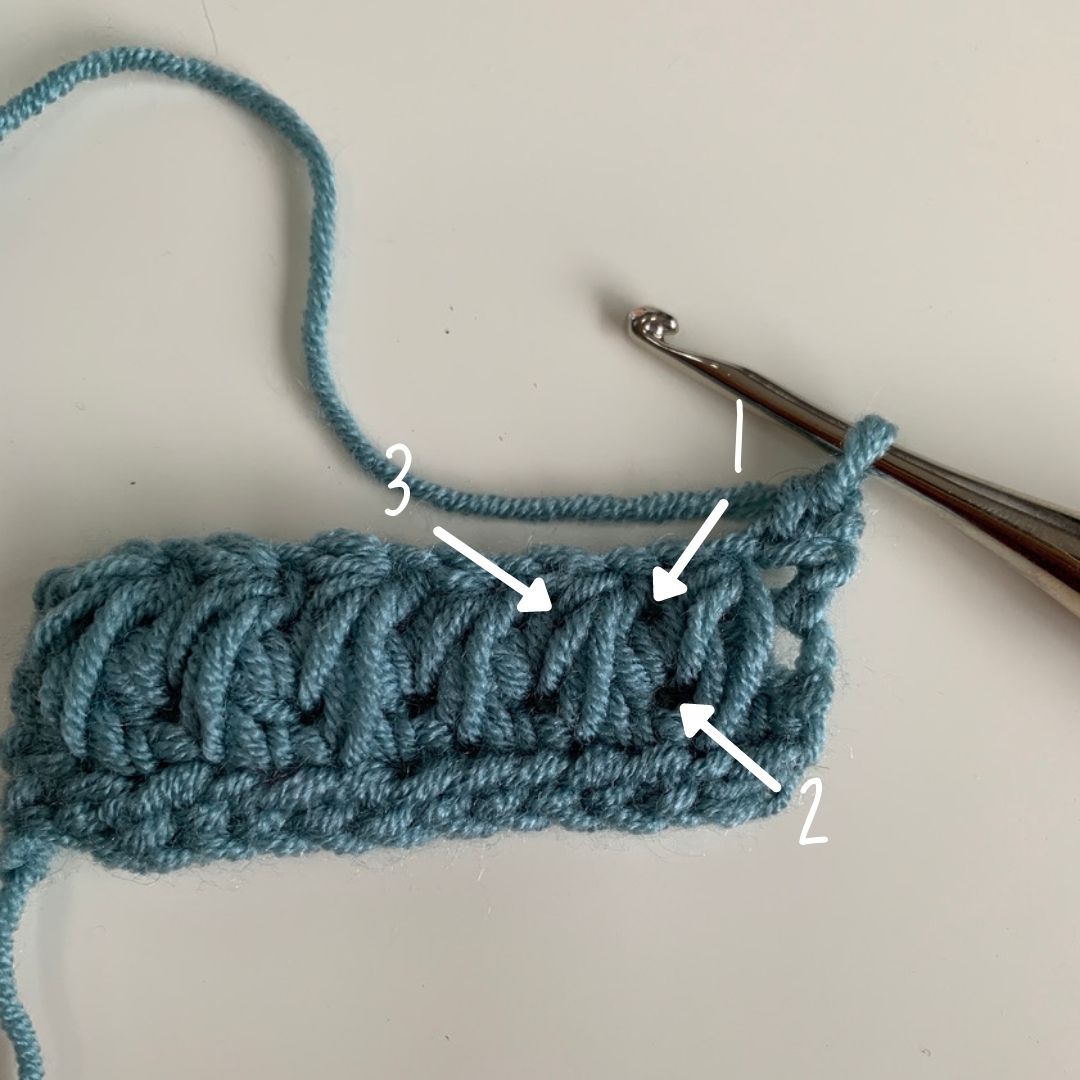
Now for the second and anymore feather stitches you need to put your hook in slightly different places.
Exactly the same process as above but in the numbers above. The first yarn over pull through is in the same space you made the last stage of the previous stitch.
Continue across in these spaces, making 1HDC in the top of the last HDC from the previous row.
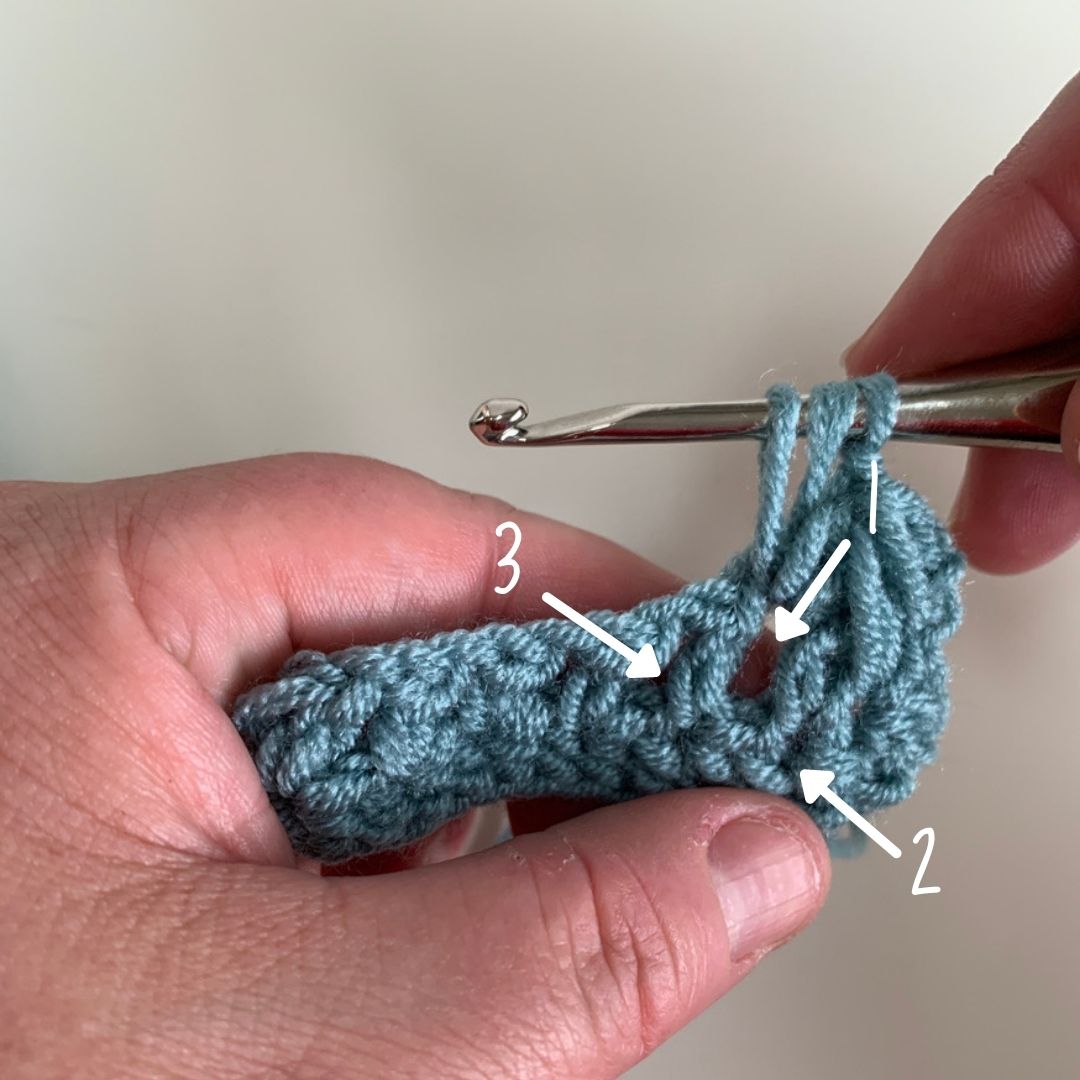
Row 2 of the the Feather Stitch
Chain 1, HDC in the base of the chain.
Same process as above in the bullet points, But going through the spaces listed here.
Next Stitch, and any further ones
Continue across, making 1HDC in the last stitch.
To finish off the work and to get a flat edge, make 1HDC in the top of each feather stitch AND each ch1.
Fasten off, weave in ends.

If you’ve liked this, please Pin it below:
Join me at Off The Hook For You to share your crochet!
Thanks for visiting – I’d love to stay connected with you so please sign up for my email list where a free PDF pattern is waiting for you (just so you can see what my PDF patterns are like).
Finished one of my crochet pattern makes? I’d love to see it and so would the world, so get sharing! You can find me in the following ways:
- Join my new Facebook group
- Share a picture on Instagram and tag me #offthehookforyou
- Share your projects on Ravelry
- Share your projects on LoveCrafts
Disclaimer
This post may contain affiliate links which I earn a small commission from if you choose to click and purchase anything from. You pay the same price, I get a very small amount for sending you their way. It helps me to make my crochet patterns free on the blog.