It seems all I’ve been doing lately is playing with lovely mercerised cotton – specifically the Yarnart Begona – which I have to say is amazing to work with!
After that hat, and then the other hat, I decided to play with the brim yet again. ?In the original wonderful pictures of the hats, and everything that goes with them in Russian, the more open weave hats have a different more open weave brim….. which stands up nicely. ?So I watched a Youtube video in Russian, and thought – hey I can do that…… ?So this is my attempt (There is also a free version of the hat pattern by a different designer?on Ravelry?- called a Summer Cloche by Luba Davies – who has written it up in a much nicer form than I have)!
I can say it’s been a bit of an up and down experience. ?I thought I had it sussed – with the help of some strimmer cord……….. but it wasn’t meant to be!
So the start of the hat – its found here in the diagram form

So – sat in a soft play centre?on Mothers day, crochet hook (2.5mm), yarn, scissors and marker – I started…


A simple start like a normal hat of chain 6, slip stitch over, and then as doing double crochets (USA terms), chain 4 (this counts as the first DC).
DC into the ring, chain 1. ?repeat this until you have 12 DC ( 11 plus the chain 4).

From this point on – everything is worked in a V-Stitch.
V-Stitch (VS) = DC, CH1, DC. ?(First V stitch of the round is chain4, DC)
Round 2: ?1 V-Stitch in each gap then SS into the CH3. = 12?VS

Then – just think of this like any other hat you’d make……. but using V Stitches:
Round 3: 2 VS in each VS
Round 4: 2VS in 1st VS, 1 VS in next (then 2VS, 1 VS in next)
Round 5: 2VS in 1st VS, 1 VS in next 2 VS all the way round
Round 5: 2VS in 1st VS, 1 VS in next 3VS ?all the way round
2?VS in 1st stitch, 1 VS in the next(increase the numbers) , etc etc – until you get to the correct diameter for a hat, then just stop increasing and work down to the desired length.

This one I stopped here – 13cm – it fits my 4 year old (who’s tiny).
One more round took me to 16cm – which fits me as an adult when stretched, but loosely on my daughter!
Then it just gets longer and longer….

As a speed gauge – I managed this in about 1.5 hours, minus trips up and down in the soft plat for food, drinks etc.
When I got to the length I needed – it was time for the brim (this time done in the local hospital with my daughter!)
Brim row 1?- 1 SC in every stitch (so 3 per V stitch).
Brim?row 2 (on my hat in pink), 1 SC in each stitch
Brim row 3- 2SC in first stitch, then 1 SC in next 2 stitches and repeat (just realised my photo shows one in each stitch on this row – but I unpicked this)


Row 4 – Chain 4, skip a stitch, DC in the next stitch, *CH1, skips stitch DC in next stitch* all the way round. ?(This then gives you the holes to do the V Stitches)

Brim – Row 5 – V stitch in each gap.
I continued this until I had 5 rows of V stitches.
(This is the bit of the pattern that didn’t work…………. but I thought I’d show my disasters with you)
So in the Russian video they use strengthening wire – or in my case – Strimmer cord………
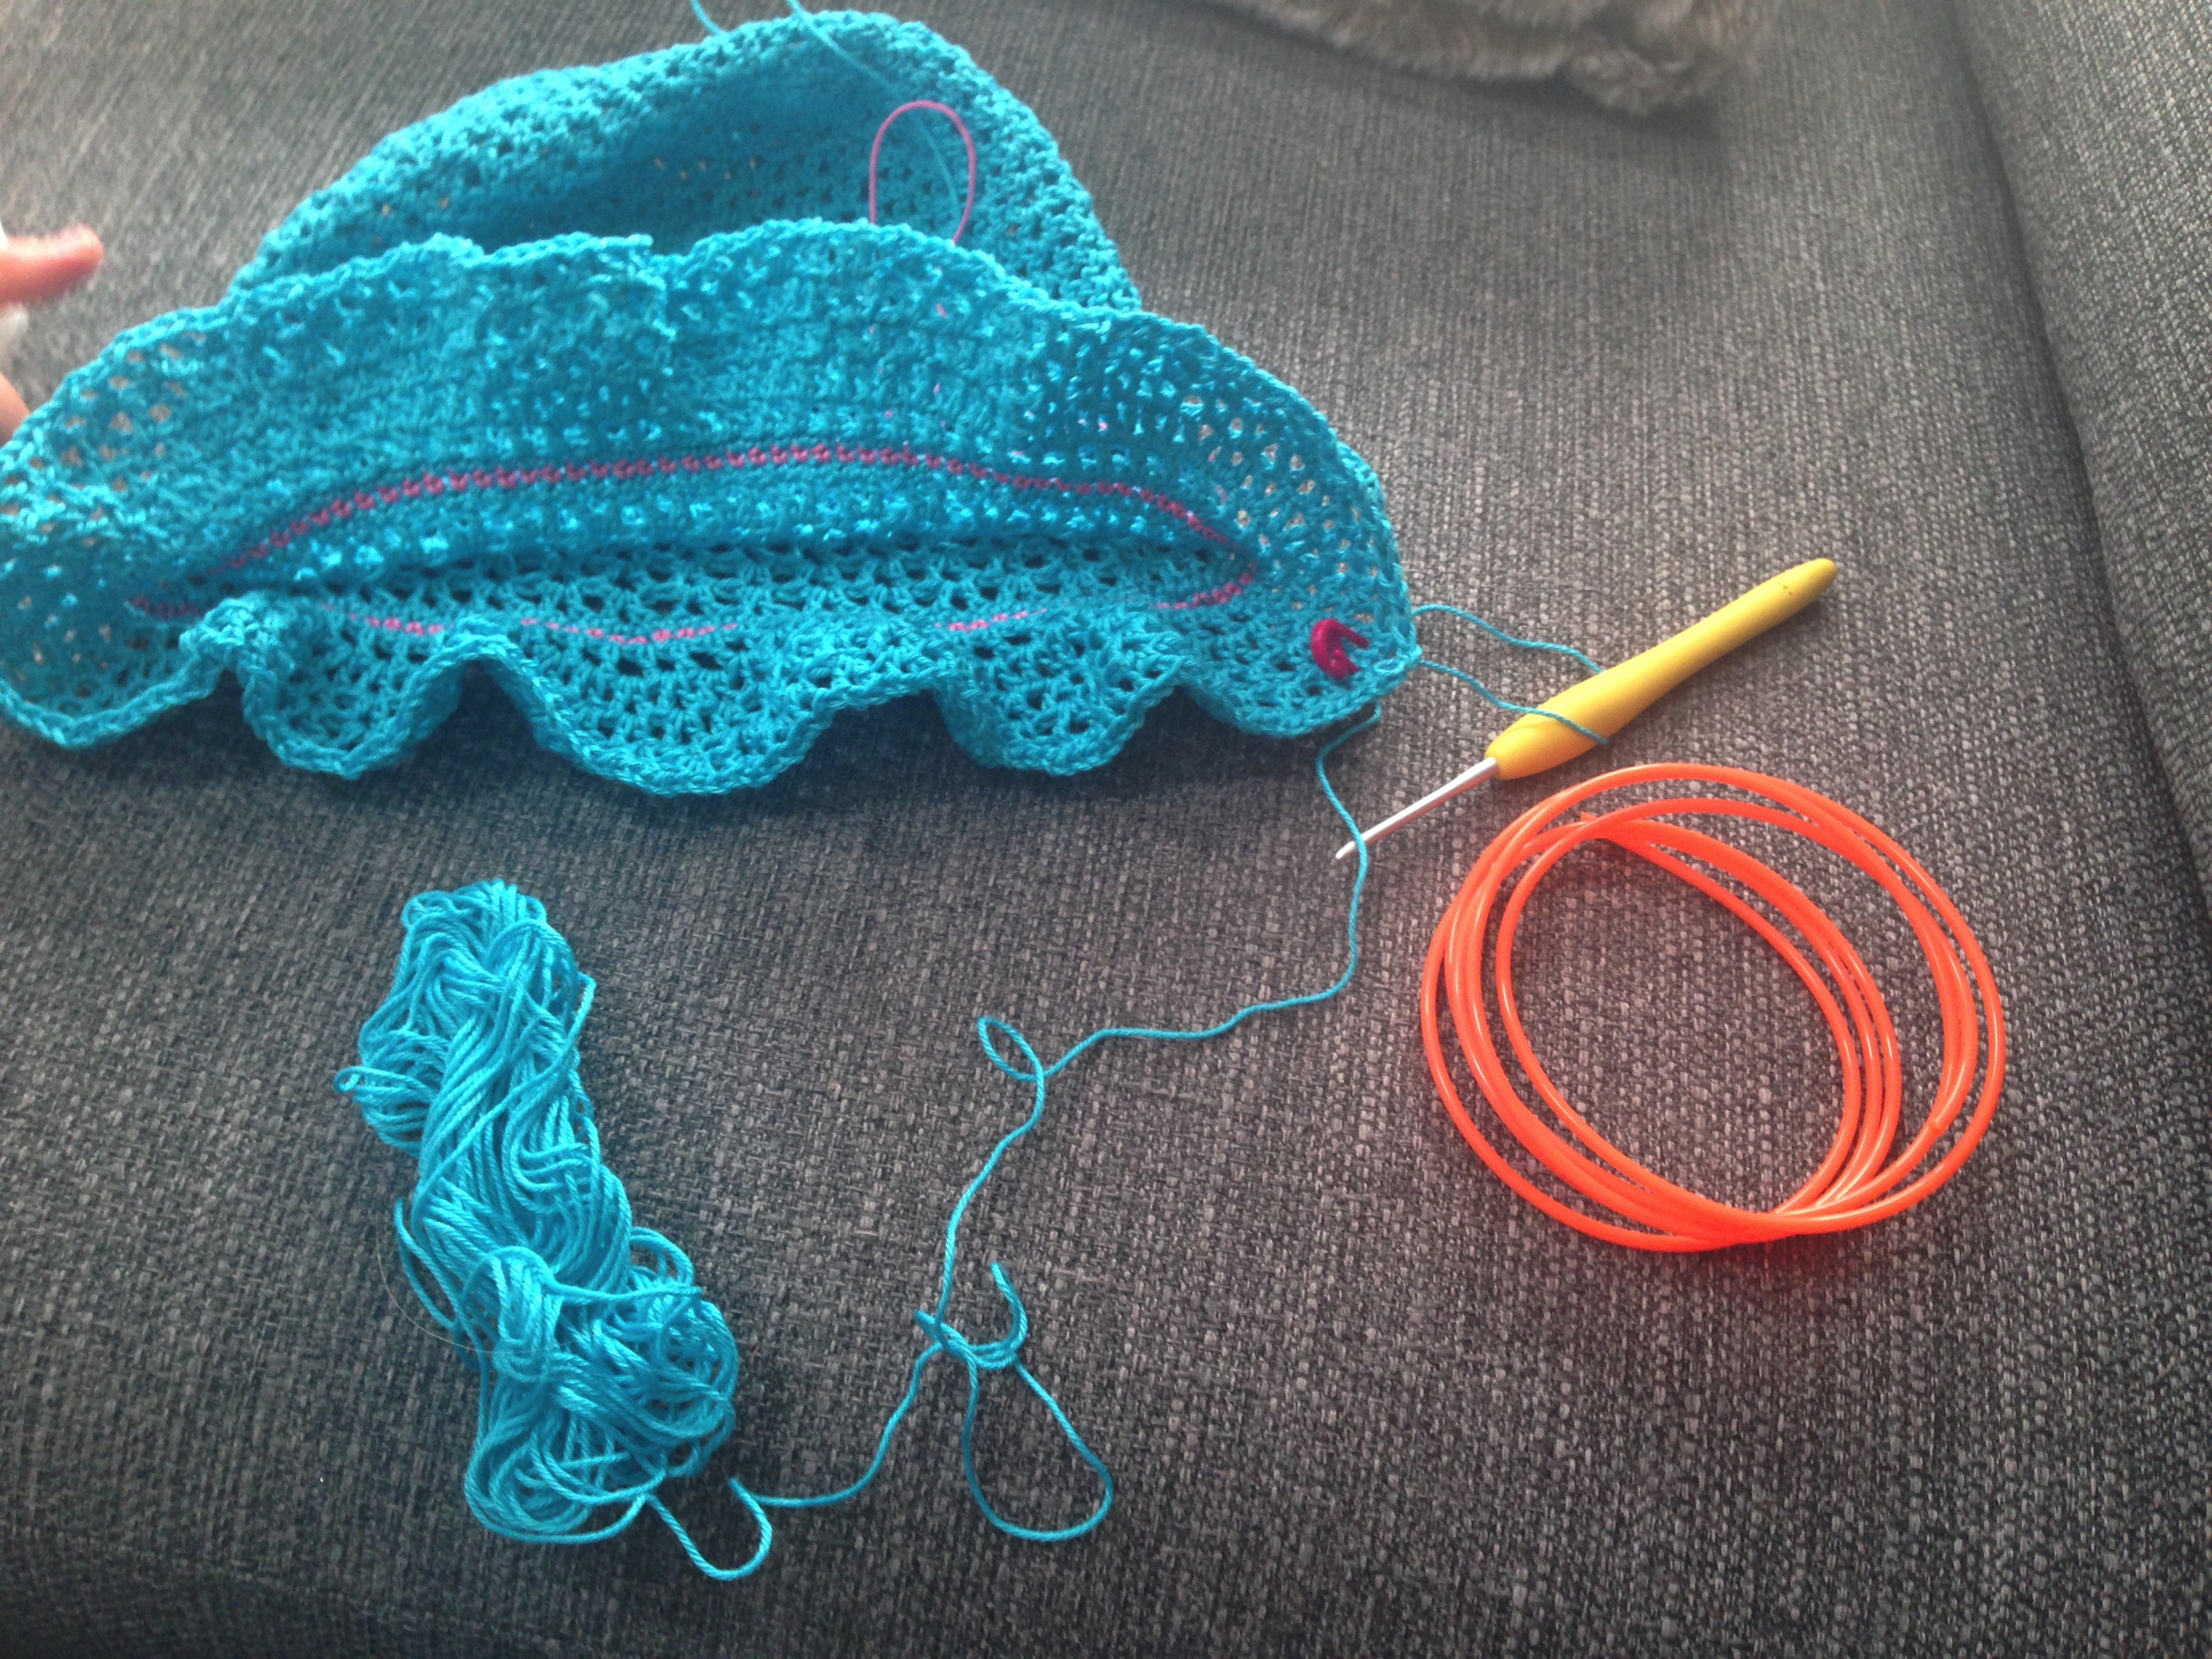
My word – it was bendy – basically I had to try and hold it straight it and single crochet around it….

I stuck with it……. it seemed to take forever and took a lot of concentration


Then would you believe it…..It wouldn’t sit nice and straight! ?I sat books on the sides for 48 hours, which made it a bit better.

But to be honest – it looked awful……

So this happened…… and boy did it feel good. ?Orange cord discarded, and it all unpicked.
So the last row of the pattern now will read:
Change to pink again – and SC all the way round!

I still need to do some flowers and leaves to pretty it up – but here is my model displaying the hat (and her epiglottis) to the best of her ability!
Hope you’ve enjoyed my hat journeys, more to follow soon.


